How to Install your Own Fonts on MAC OS X
Have you ever wanted to install your favorite fonts on your MAC but couldn’t figure out how to do this, Now you can follow our below steps to learn how you can install fonts on MAC.
Whether it’s Mac book or Mac Air, no matter your MAC OS version, follow our steps to get successful result at the end, let’s start.
Install Custom Fonts on MAC OS X
1. Close all your MAC applications to avoid any installation error.
2. Download your favorite MAC fonts.

3. Choose the font that you like and download it, I will take this font on the screenshot as an example.

4. Right-click the ZIP file and un-extract it, once you do that a new folder with the same name will appear.

5. Open the extracted folder and you will notice a lot of files inside it.
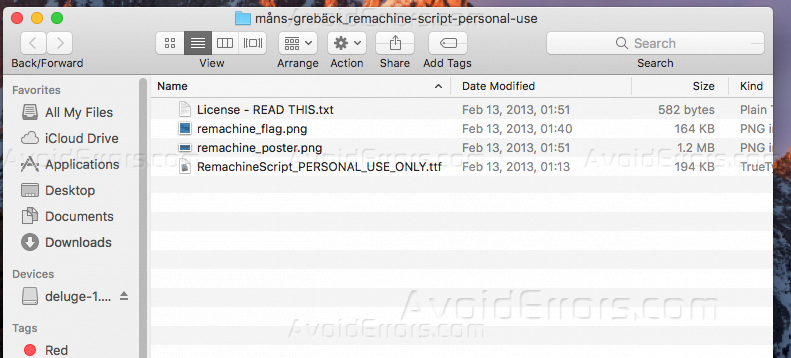
6. Double click the file with the extension “.OTF” or “.TFF“, the font I downloaded is “.TTF“.

7. After you are done from step no#6, you notice the preview of your downloaded font, if you like it click on “Install Font”.

8. Right now your font is installing on your MAC.
9. Now your font is successfully installed, open “TextEdit”.

10. Write anything and select your font from the font list to test as I had tested on the screenshot below.

You can download as many as you want from fonts and install it very easy with this tutorial there is a lot of websites which provide fonts.
Summary
After this tutorial you should be able to know how you can download any font from the font sites which are a lot on the world wide web and how you can install it very easily, and also test it to make sure that your font is successfully installed, for any inquiry regarding this tutorial please comment with it below and I will try to reply you ASAP.


