How to Backup Your MAC?
This tutorial will train you how to back up your data & files on your Mac to an external hard disk and/or Apple’s cloud-based storage service, iCloud, and there are 2 methods for how to do that.
Method 1: Using “Time Machine”
1. Attach your Mac with a formatted external hard disk. Connect the drive to your computer using the cable provided (such as USB, Lightning or eSATA).
2. Press on the Apple menu. It’s the icon located on the upper-left corner of your Mac screen.
![]()
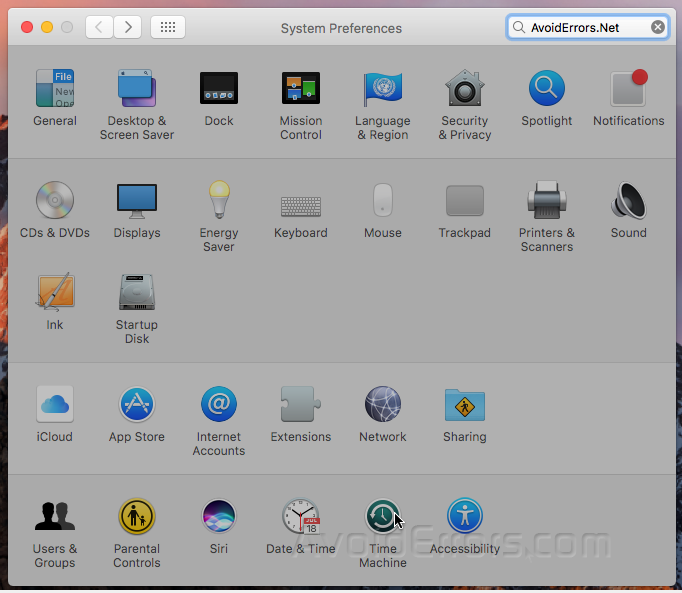
3. Press “System Preferences”, It’s in the second section of the drop-down list.

4. Click on “Time Machine”. It’s near the bottom-center of your Mac screen.
For older versions of macOS and Time Machine, be sure that “Time Machine” feature is set to “On”.
5. Click “Select Backup Disk”, It’s located on the right pane of the dialogue box, just like below

6. Select the external disk you attached to your Mac, and Click on “Use Disk”, It’s in the lower-right corner of dialog box.

7. Make sure to check”Back Up Automatically” in the left pane of the dialog box if you need that your Mac back up at regular intervals and also check “Show Time Machine in menu bar” to make a shortcut in the menu bar to Time Machine preferences and backup status.

8. Press on Options, It’s in the lower-right corner of the window if you’d like to exclude location or files from the backup process.


Method 2 : Backup to your “iCloud”
1. Press the Apple menu. It’s the icon which located on the upper-left corner of your MAC screen.
![]()
2. Click “System Preferences” which located on the second section of the drop-down list.
3. Select iCloud, just like below

4. If you haven’t use your Apple ID, it will prompt just like below, type your Apple ID and password if you have one, and if not click “Create Apple ID”.

5. Make sure to Check the box next to “iCloud Drive.” so you can store files and documents on iCloud.
Do so by choosing “iCloud Drive” in any “Save” dialog box or dragging files to iCloud Drive in the left pane of a Finder window.
And also make sure to select which apps got the permission to access your iCloud Drive by clicking “Options” button which it’s next to “iCloud Drive” in the dialog box.
6. it’s time to select what to back up and what to not, just select the data you want to store on iCloud. Do so by checking the boxes below “iCloud Drive”.
Check “Photos” if you want to back up and access your Photos on iCloud from anywhere.
Check “Mail” to sync and store email messages on iCloud from anywhere.
Check “Contacts” to keep a copy of your contacts on iCloud from anywhere.
Check “Calendars” to keep a copy of your calendars on iCloud from anywhere.
Check “Reminders” to keep a copy of your reminders on iCloud from anywhere.
Check “Safari” to keep a backup of your Safari data, such as browsing history and favorites, and your saved password, bookmarks, on iCloud.
Check “Notes” to keep a copy of your notes that you save it before on iCloud.
Check “Keychain” to share an encrypted copy of passwords and payment data across the devices that signed in with your Apple ID and password.
You may need to scroll down to see all the selections.

TIPS
Stay proactive and regularly check on your backup devices to check their integrity, ensure that your stored data is current, and to see if new, better methods for backing up your data are available.
Prioritize the data you back up to make sure that you are protecting the materials that are most valuable and irreplaceable.
Include one off site backup away from your computer, either using iCloud or an external hard drive, where you can retrieve your data should something disastrous take place near your computer.
iCloud may not offer enough space to back up all of your data, especially if you have lots of music, videos and photos. In that case, you may want to consider another cloud storage program such as Google Photos or Microsoft OneDrive.
Back up your data to multiple places, including external hard drives and iCloud storage, to ensure that you have a variety of options in case one backup fails.
Save your data on CDs, DVDs or Flash Drives as a supplementary backup.


