How to Enable Remote Desktop In Windows 11
As we all know that Windows 11 comes with high built-in features, one of them is the Microsoft Remote Desktop connection. This feature will let you remotely connect your PC to a secondary system from anywhere.
Using the Microsoft Remote Desktop connection feature, you will be able to access your system remotely as long as your computer is turned on. In this article, we will let you know how to enable Microsoft Remote Desktop connection in Windows 11.
Enable Remote Desktop In Windows 11
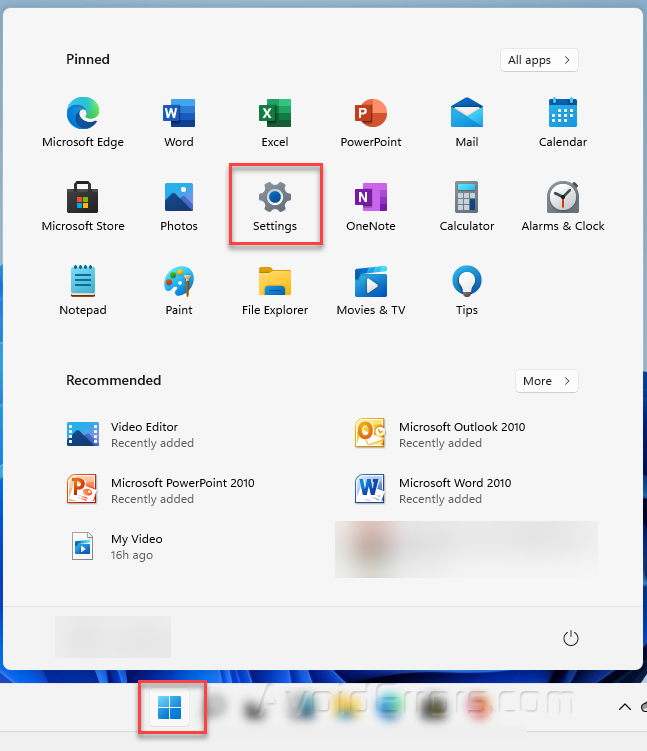
To enable Remote Desktop connection in Windows 11, all you need is to click on the windows start menu and select settings.
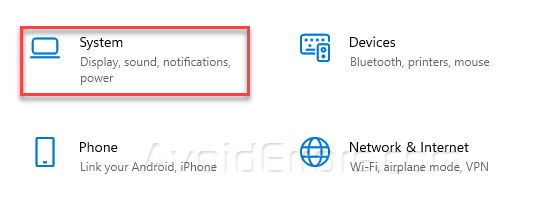
Now click on the System option.
Next, scroll down a bit and select the “Remote Desktop” on the left side of the Window.

On the Remote Desktop section, enable or turn on the remote desktop, and the Remote Desktop will be enabled simultaneously.

Note By default, the machine automatically saves the first created account and keeps it in the administrator’s group. The users who want to use the remote desktop must be in the administrator’s group or on a local PC must be a member of the Remote Desktop group.


