How to Fix the Memory Management Stop Code in Windows 11
Almost every version of Windows has had the Windows memory management stop code. It’s a common Windows error that usually comes with a “blue screen of death,” which means that Windows 11 has crashed.
The Windows memory management BSOD error is annoying, but there are several ways to fix it on Windows 11, this guide will you show you how.
Restart Your Computer
The best way to fix a lot of Windows 11 errors is to restart the system. You don’t have much of a choice, because if your system crashed because of a memory management error, you’ll have to restart it anyway.

Update Windows 11
Press Windows + I on your keyboard to open Settings.
Go to Windows Update and click on Check for Updates.
After checking for updates, click on Download & install if there are updates available.

Update Your GPU Drivers
To update your GPU drivers, go to the website of the manufacturer and download the most recent version. Most users will choose either Nvidia or AMD.

If you’re unsure which GPU you’re using, type dxdiag in your Windows search bar and select Open.

Under Display 2, you will see the Manufacturer of your PC.

Run the Memory Diagnostic Tool
Type Windows Memory Diagnostic in your Windows search bar and select Open as Administrator.

Select Restart now and check for problems and follow any on-screen instructions.

Reset Windows 11
If everything else fails, and we mean everything, you could reset Windows 11. By resetting Windows 11, your whole operating system will get a brand-new set of operating system files. This should fix the Windows 11 memory management problem.
Press Win + I in your keyboard to open Settings.
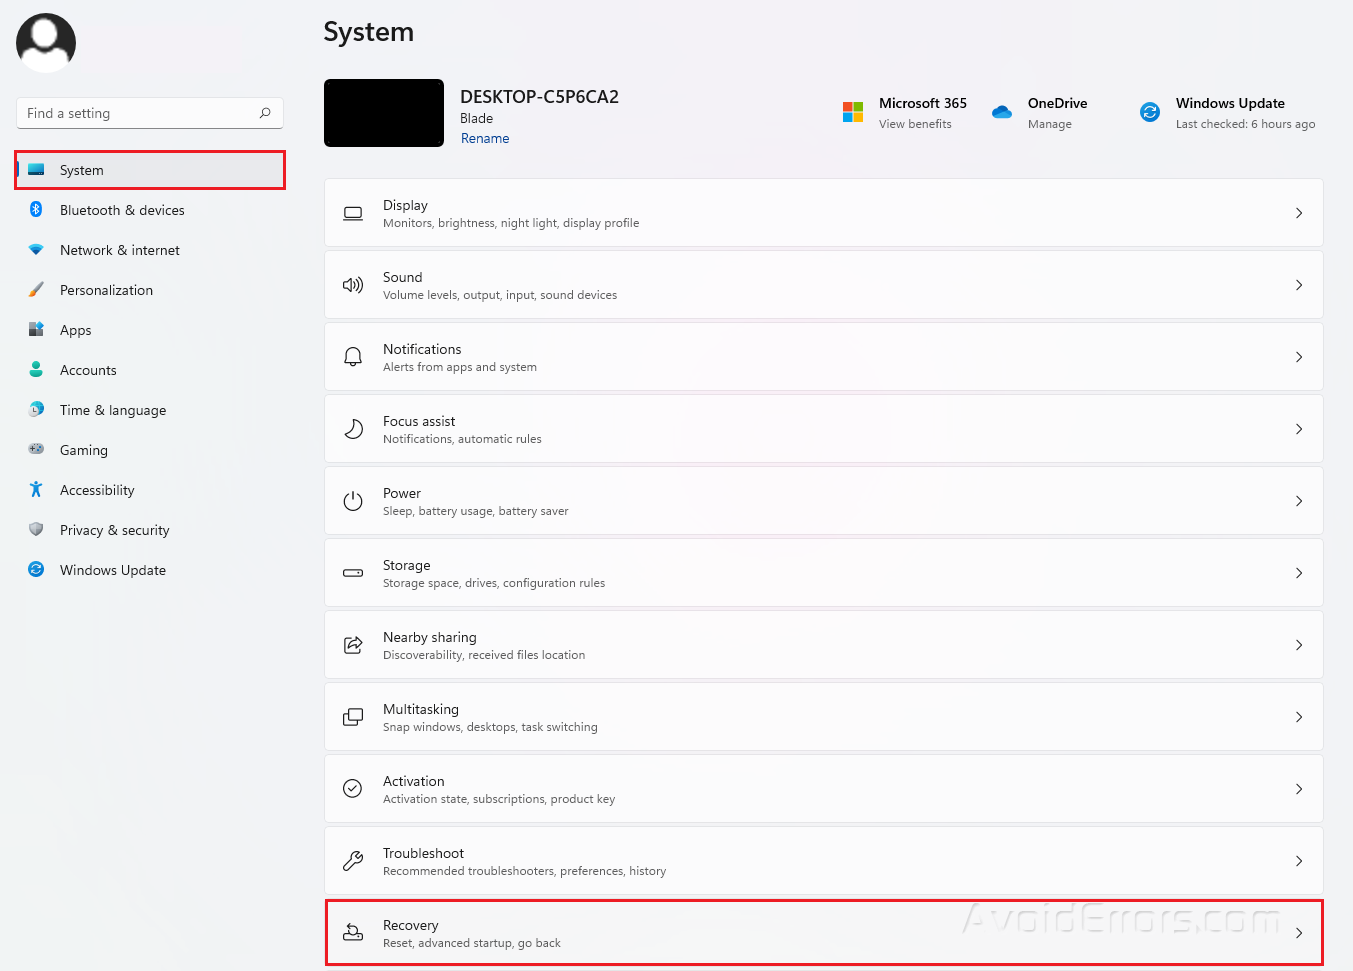
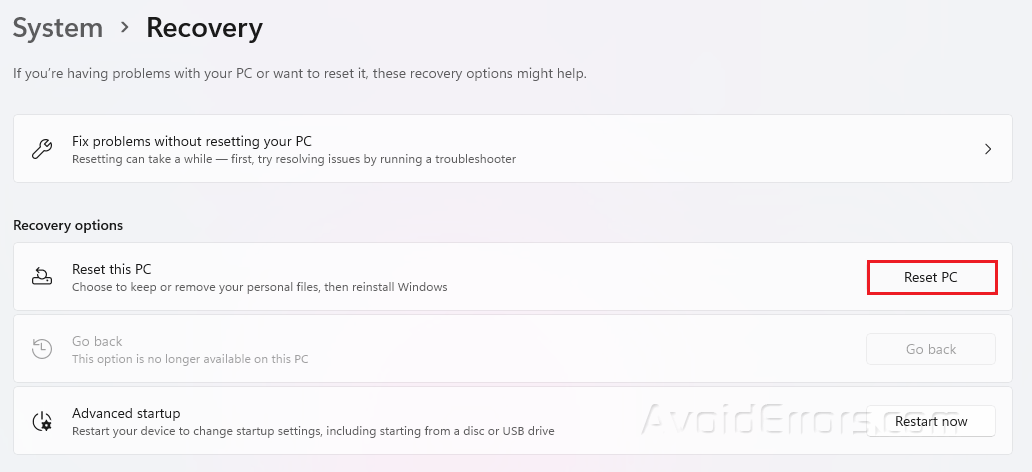
Go to System and select Recovery.
Select Reset this PC.
You may select which files you want to keep or completely reset your PC.


