How to Use Advance IP Scanner for Network Management
When we are working in a network environment where we have a lot of computers and network devices it’s very hard to manage all those resources. For this purpose, we must use many tools some of them are paid tools and some of them are freely available.
In this article, I will explain how we can use advanced IP scanner tool that is freely available to manage all of the network devices, computers and mobile phones connected to the LAN. It can be freely downloaded from Here.
This tool can be downloaded from advanced- IP-scanner.com. This tool is free to download and is compatible with Windows 10 as well. Click on the Free download button to download advanced IP scanner on your computer. Once downloaded run the setup.
When the setup will start it will ask you to select the language to select your preferred language and click OK.

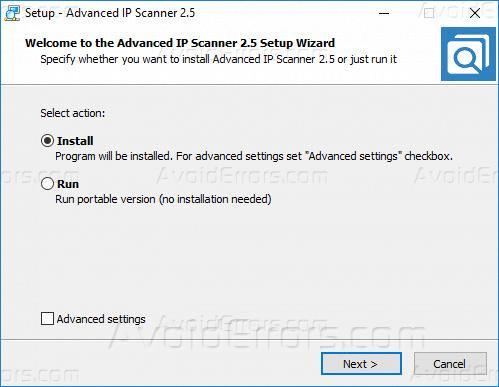
Then it will ask you to select the proper action for installation you can install this software by selecting the install option or you can select the run option to run this software as a portable software. In this article, we will install it by selecting the install option and click next.
Accept the terms of license agreement and click install.

Once the installation has completed click the finish button.
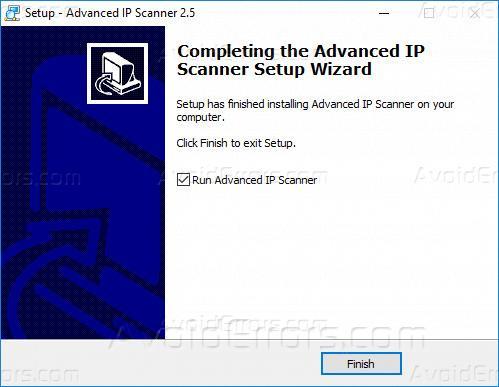
Now it will start the advanced IP scanner software for you.
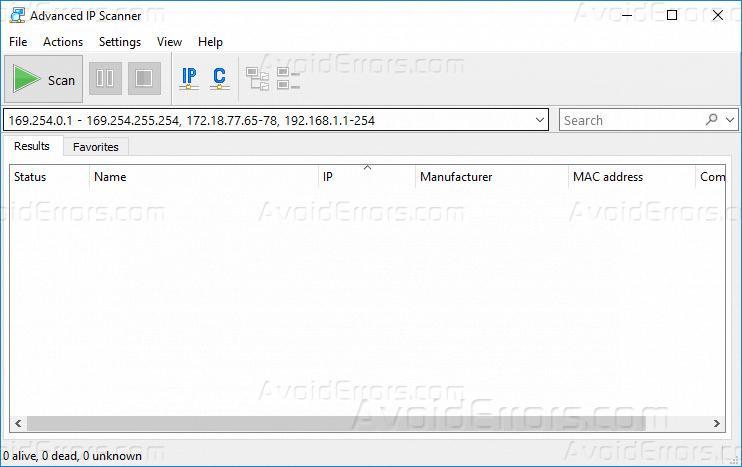
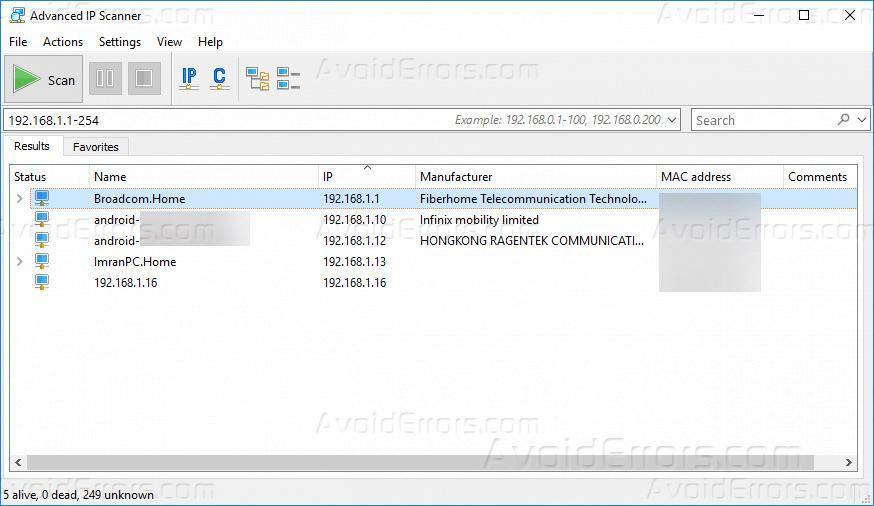
On the top of the address bar, you will see some of the IP addresses by default these IP addresses gives you the example how you can search and scan your network within the IP ranges you can define the ranges in different ways like 192.254.0 .1 – 169.254.255.254 and like 192.168.1.1-254.
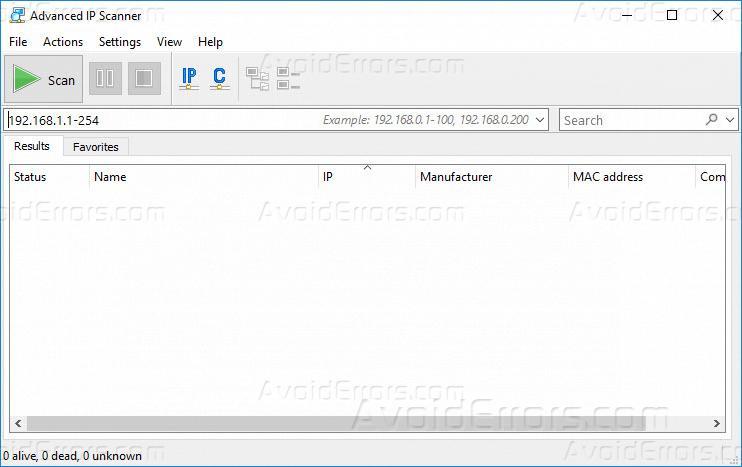
I have entered 192.168.1.1-254, This will scan the IP addresses range starting from 1 to 254. Now click on the scan button and it will start scanning the IP range that we have defined.
Once the scan has been completed it will show you the results in which it will have the status of the machine either online or offline than in the next column it will have the name of the machine then it will have IP address assigned to that machine or the network device, in the next column If the software would be able to find the manufacture of the device it will show you the manufacture of the device and then the MAC address all the devices it’s scanned.
On the right side of the computer or the devices you will be able to see the arrow sign, click on the arrow sign and it will expand the resources shared by that computer or the device like in this case it shows that on ImranPC Users folder is shared and HTTP and IIS services are running on the machine.

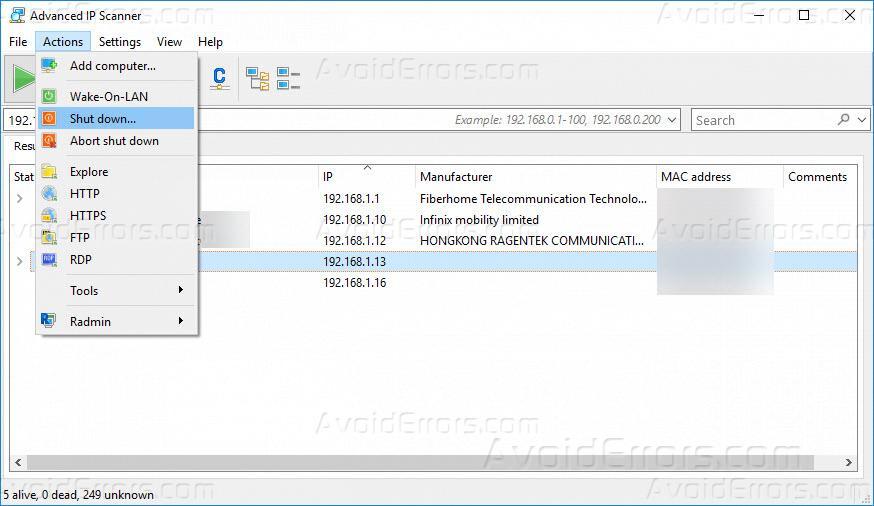
There are many other features and actions available in this software, we can perform many actions on the devices. Let’s say you have selected the computer, Then you can click on actions in the menu bar you will see many options like shut down the remote computer, Abort the shutdown on the remote computer , explore the shared folders, access the HTTP services running on the computer, access the FTP services running on the computer or even start a remote desktop session using RDP to that selected Computer.
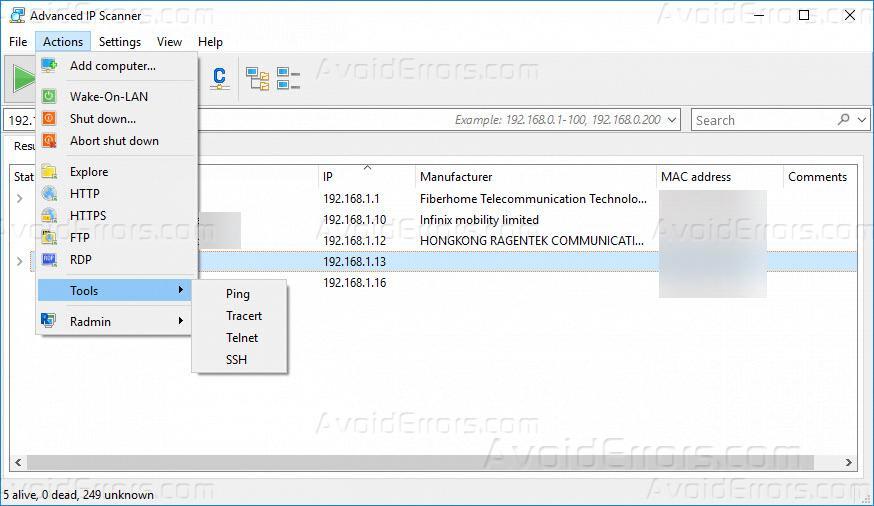
There are some tools that are also available in the action menu, select the device click on the actions on the menu bar and then click on tools you will see Ping, traceroute, telnet, SSH.
You can select any of the tools to perform the selected operation on the selected machine so let’s say if I have selected the machine with IP address 192.168.1.13 and want to ping it, I will go in the action menu click on tools and then click on ping.
It will start pinging the selected device. If I have selected I router or a switch I can click on telnet to telnet the router or the selected switch. If the selected device is a server, we can have SSH connection by clicking on SSH.
The advanced IP scanner tool gives us the flexibility to export the scan result to an excel file for future references.
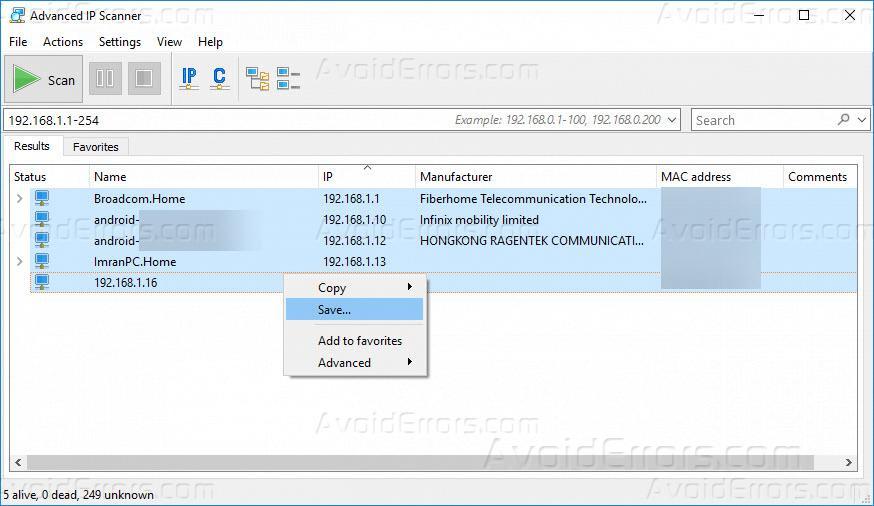
Select all of the devices by pressing CTRL+A keys combination and the right click on the selected content, It will show you a menu we are you will have the option to copy the contents, click on copy and it will show you the options that you want to copy in this case I have selected all of the displayed options to be copied, click All.
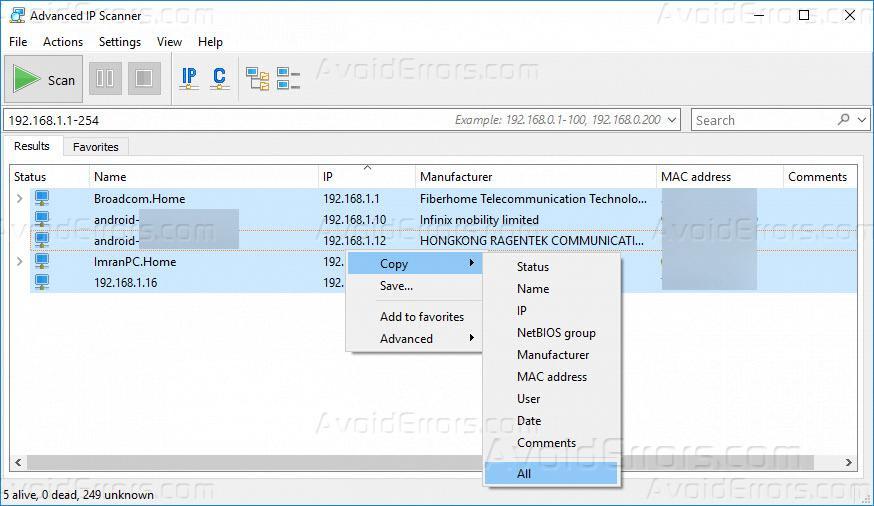
Now open the excel file and paste it using CTRL+V key combination. All the data that was scanned by the tool will be copied to the excel file.
You can also save the scan results as an XML file by right-clicking on the selected data and then click on save option.
It will ask you to select the location where you want to save the XML file. Select the location and save the file.

You can also select the resources which tool should scan during the scan process, for this purpose click on the Settings on the menu bar and then click on the option. Then click on resources and underscan resources you can check what resources should be scanned.

You can also select the performance of the scanning tool by clicking on performance and then setting the scanning speed by adjusting the slider. The high accuracy scan will always run slowly.


