How to Install Android 7.0 Nougat on VirtualBox
In this tutorial, I am going to explain how to install android 7.0 Nougat on VirtualBox. While Google team says about Android 7.0 Nougat “Android Nougat is our sweetest release yet, with more ways to make Android your own”.
There are many new and cool features and tools that are included in this big update. for example, over 1500 emoji including 72 new emoji icons, multi Local language settings, multi-window view, quickly switch between your applications, custom quick settings, notification direct reply, bundled notifications, notification controls and much more stuff like that, follow the below steps to guarantee a successful result.
Install Android 7.0 Nougat on VirtualBox
1. First, you have to download Android 7.0 Nougat ISO, and make sure that you already downloaded and installed VirtualBox on your computer.
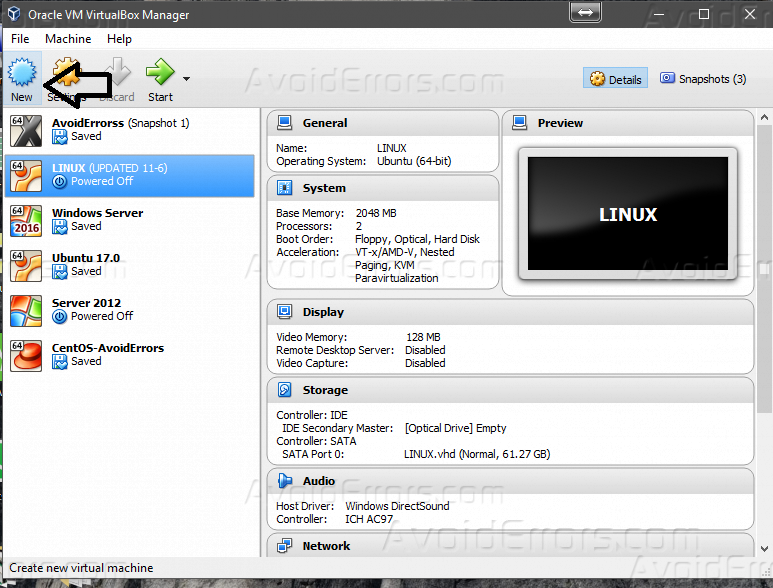
2. Open your Virtualbox and click “New” to create a new virtual machine.
3. On the “Name and operating system” Windows, type the preferred name that you would like to name your Android 7.0 Nougat VM then Choose Linux for type and for Version to choose Other Linux (64-bit) then click Next.

4. Customize the Memory size to 2048 MB and click Next.

5. After you set up the memory size, Select “Create a virtual hard disk now” on the Hard disk window and click Create.

6. For hard disk file type, select VDI (VirtualBox Disk Image) and click Next.

7. Select “Dynamically allocated” on the Storage on physical hard disk window and click Next.

8. Now customize the size of the virtual hard disk in megabytes. This size is the limit on the amount of file data that a virtual machine will be able to store on the hard disk. Then give it a name to the new virtual hard disk and click on the folder icon to save where you want.

9. Your virtual machine should be created. So now select the VM and click on the Settings button.

10. Select System and on the Processor tab change it from 1 CPU to 2 CPU and left the others by default.

11. On Display panel, set the video memory to 128 MB and leave the others by default.

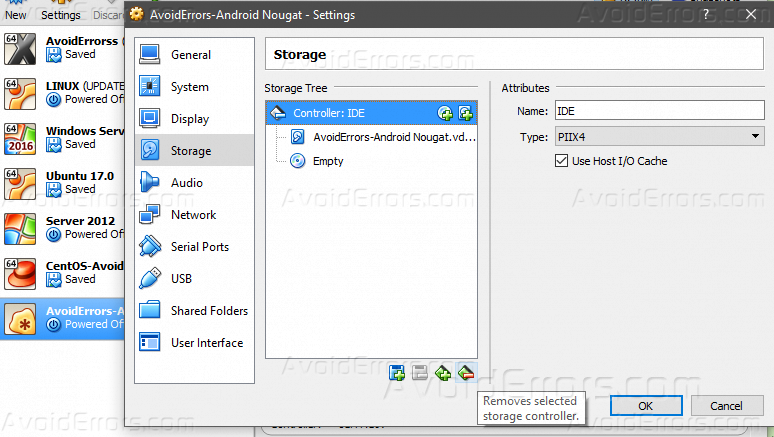
12. Select Storage panel and choose the Controller: IDE and click on the (-) minus button from the bottom of the window to remove it.
13. Click the (+) Plus icon and Select Add IDE Controller.

14. From the options, click “Choose existing disk”.

15. Now in this Step go to This PC > Local Disk (C:) > Users > username > VirtualBox VMs > “VM Name” that you named on step 3, select it and click Open.

16. Click on the (+) plus with CD icon and select Leave empty.
![]()
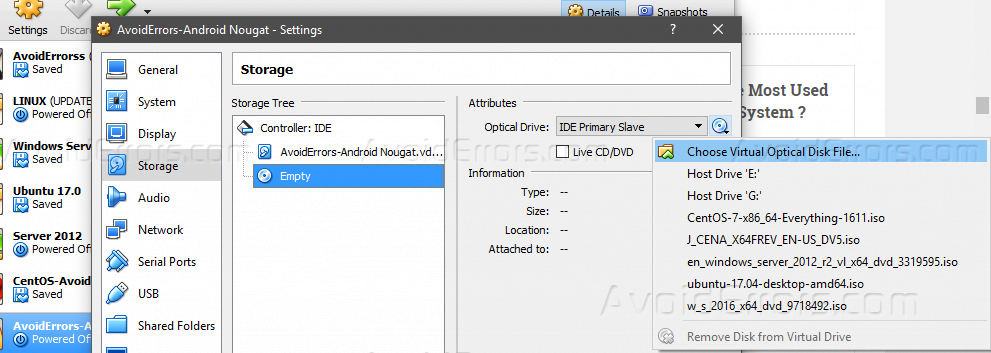
17. Click Empty with CD icon and Select the Optical Drive to IDE Secondary Master then click on the small CD icon and select Choose Virtual Optical Disk File.
18. The Android 7.0 Nougat iso file that you download from the link above then select that and click Open.

19. Save the Changes to that you made to the Android 7.0 Nougat virtual machine. Finally, you must be ready to play the VM.
Play Android 7.0 Nougat Virtual Machine
1. Now select the Android 7.0 Nougat virtual machine and click on the Start button to turn it on.

2. So now from here Select the last option Installation – Install Android-x86 to harddisk and press enter from your keyboard. This options must drive you to the Installation windows of Android 7.0 Nougat.

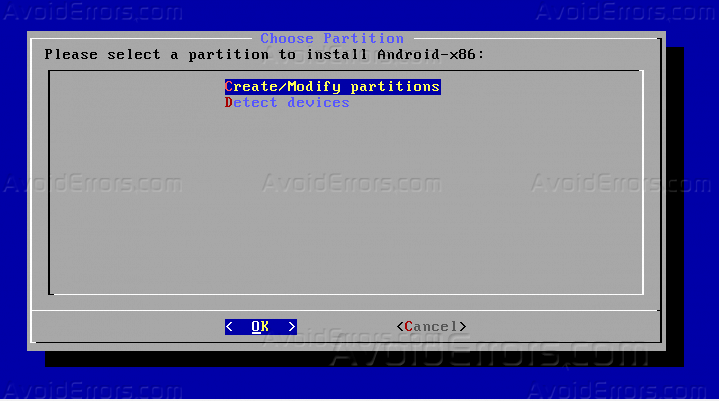
3. Select Create/Modify Partitions and press enter from your keyboard.
4. Select No and press enter from your keyboard, when you are asked to want to use GPT partition.

5. On the partition page, select New and press enter from your keyboard.

6. Select “Primary” partition and press enter from your keyboard.

7. Type the size of the partition that you want to create and press enter from your keyboard.

8. Now in order to make it bootable select Bootable and press enter from your keyboard.

9. Now select “Write” and press enter from your keyboard.

10. Type YES and press Enter from your keyboard.

11. After writing the disk, you are done from here, so select Quit and press enter from your keyboard.

12. On the Choose Partition window, select the partition that you nearly created and press enter from your keyboard.

13. Select “ext4” and press enter as it will be the file system.

14. Select Yes and press Enter.

15. When you are asked want to install Grub Bootloader, select YES and press Enter.

16. For the EFI GRUB 2, select Skip.

17. For system directory as read-write select “Yes” and press Enter.

18. When you got the screen below, click on Devices > Optical Drivers > Remove disk from virtual drive.

19. When you get the screen below, click Force Unmount.

20. You should be done installing the Android 7.0 Nougat successfully. Now select Reboot and press enter from your keyboard.
21. When you start the Android 7.0 Nougat virtual machine you will get this bootloader, select Android-x86 2016-09-02 and press enter from your keyboard.

22. Now you have successfully installed Android 7.0 Nougat on VirtualBox.

Conclusion
By following this tutorial you should have installed Android 7.0 Nougat on VirtualBox. If you encounter any problems or errors in the process of installation or have any questions or suggestions about the process of installation. Feel free to let us know in the comment section bellow.


