How to install and Configure FTP Server on Windows Server 2016
The File Transfer Protocol (FTP) is a standard network protocol used for the transfer of computer files between a client and server on a computer network.
FTP is built on a client-server model architecture and uses separate control and data connections between the client and the server. FTP users may authenticate themselves with a clear-text sign-in protocol, normally in the form of a username and password, but can connect anonymously if the server is configured to allow it.
For secure transmission that protects the username and password, and encrypts the content, FTP is often secured with SSL/TLS (FTPS). SSH File Transfer Protocol (SFTP) is sometimes also used instead; it is technologically different.
In this tutorial, we are going to explain step by step the process of installing and configuring FTP server role in Windows Server 2016.
Install FTP Server
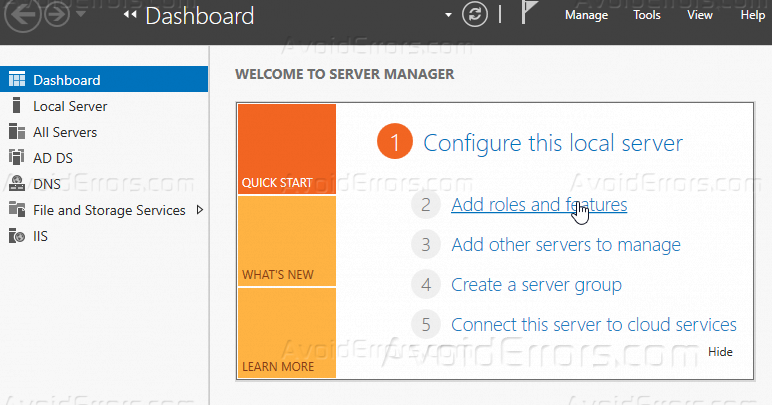
1. At the first, we need to install FTP role to do that open your server manager and click “Add roles and features”, and click Next twice.
2. Select your server from server pool and then click Next.

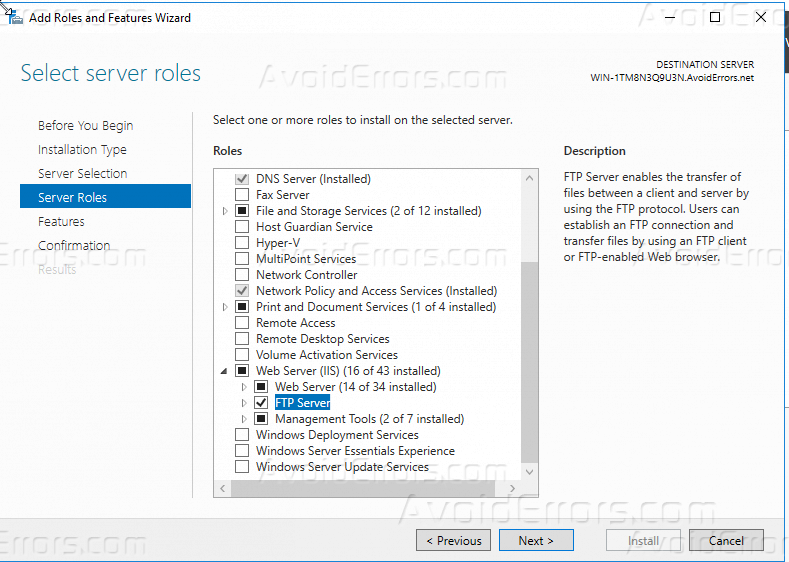
3. On the roles list, expand “Web Server (IIS)”, and check on “FTP Server” and then click Next.
4. You don’t need to add any additional features, just click Next.
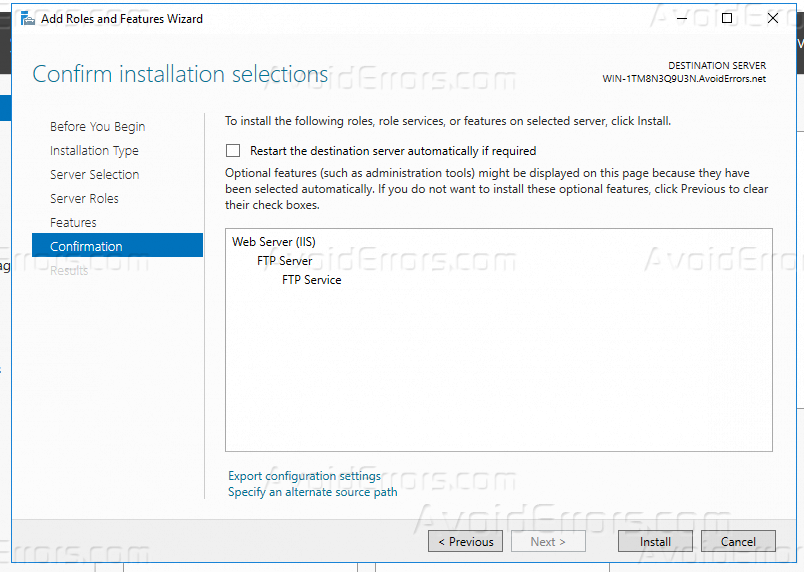
5. On this page of the installation wizard, it will confirm with that you want to install “FTP Server”, click “Install” to start the installation progress.
6. Once your FTP server installation progress is done, we will move to the configuration steps of it.

Configure FTP Server
1. Open “Internet Information Services IIS” from the dashboard of your running server.

2. Right click on sites and click “Add FTP Site…”.

3. Give your FTP site a name, and also configure the folder that will contain all the data and click Next.

4. On this step of the configuration, IP address must match the address configured in the network adapter of your server. This IP address will be used by the clients who want to access the FTP server, check “start FTP site automatically and choose “No SSL” and click Next.

5. On authentication page of the configuration choose “Basic”, this authentication not using encryption mechanism so username/password are sent in clear text, you can create users in IIS after installing Management Server under Management Tools which is in Web Server (IIS) role.
Under the authorization, select all users to allow FTP access to all users of the domain. Check both “read and write” permissions, and click Finish.

6. Now you are done with configuration but let’s test it by open your web browser and enter the IP address of your server but add “ftp://” before it.

Once you log in with your server credentials you will be able to access FTP server and check all that it contain from files and folders
Summary
After this tutorial you should be able to know how you can install FTP server and how you can configure it, if you have any inquiry regarding this tutorial please comment below and i shall try to reply ASAP.


perfect
Great !! Thank you