Install KODI (XMBC) on Raspberry Pi
In this post you will learn how to install KODI (XMBC) on Raspberry Pi. This tutorial assumes that you have a fully functional Raspberry pi and a 8 GB Micro SD card Minimum!.
If you don’t have a Raspberry Pi I would personally recommend buying the Raspberry pi-3 kit. which comes already with NOOBS pre installed on the Micro SD card and no configuration is needed.
In this tutorial we will be covering to following:
- Download and install NOOBS to the SD card.
- Properly Format the SD card Using SD Card Formatter App.
- Install KODI (XMBC) on Raspberry Pi.
So lets get stated with the first of the prerequisite:
The easiest and probably the best way to get NOOBS is to simply buy an SD card that has NOOBS already pre-installed. You can buy this at Amazon if you’re looking for a pre-installed NOOBS SD Card.
Requirements:
1. A Raspberry Pi.
2. A Micro SD 8 GB or larger.
3. A USB SD card reader
FYI: The Raspberry Pi 3 Starter Kit – 32 GB Edition is a complete kit and has everything you need to get it up and running within minutes.
Installing NOOBS Raspberry Pi
If you have a pre installed SD card please jump to step 8.
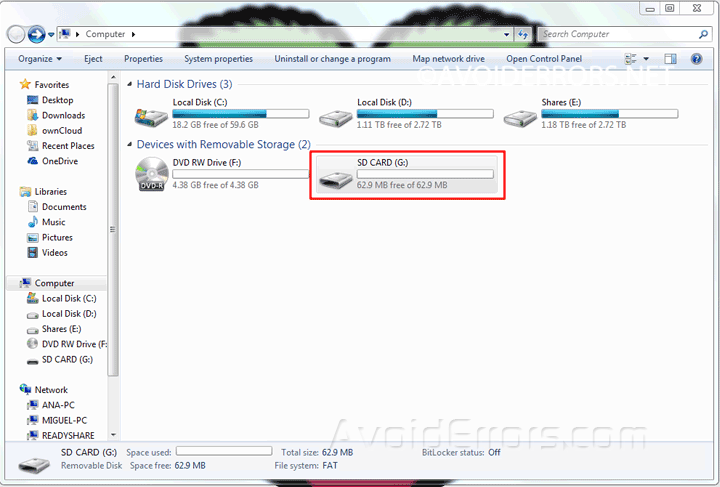
1. Insert the Micro SD card into the SD card reader then to the PC.
2. Make sure is detected by the PC and check the drive letter assigned to it. (i.e. G:/)
3. Download NOOBS zip folder.

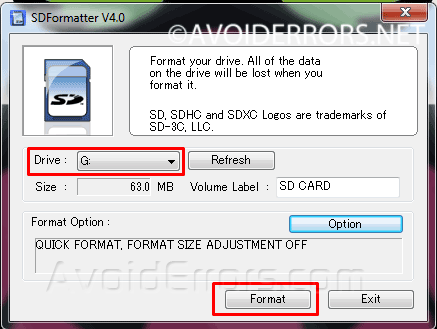
4. Download, extract, install and run SD Formatter program.
5. In SDFormatter program, select the drive letter of your SD card (i.e. G:/) and format it.
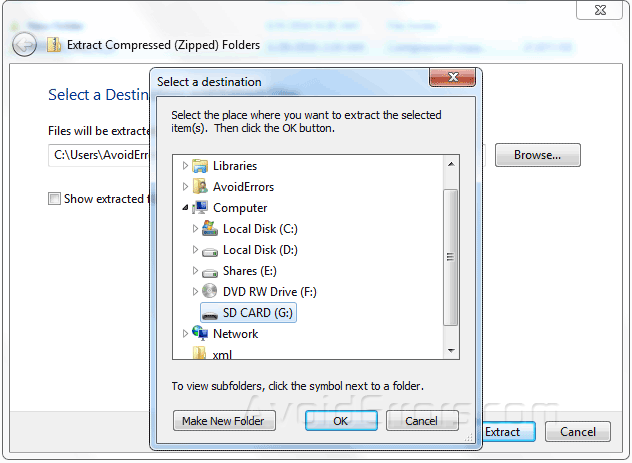
6. Now right click the NOOBS zip folder and extract the content into the SD card.
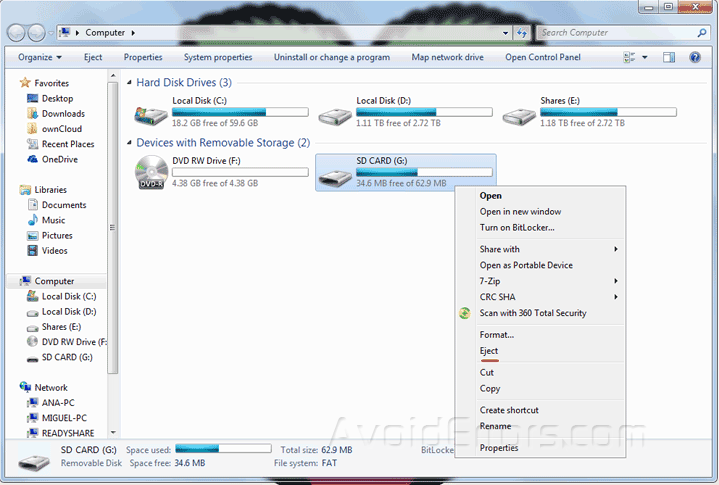
7. Once done properly eject it from the PC and insert it onto the RPI.
8. Plug in the keyboard, mouse, monitor, Ethernet and lastly the power cable to the RPI.
Installing KODI (XMBC) Raspberry Pi
9. Your Raspberry Pi will boot, and a window will appear with a list of different operating systems that you can install throughout my Pi projects. For this tutorial I will be installing RaspBMC, check the box next to RaspBMC and then click on install.

10. The installation process may take a while. While installing make sure to select the language and keyboard on the bottom of the screen.
11. Once the install process has completed, you’ll boot to the KODI (XMBC) GUI.


