How to Install OpenSSH in Windows 10
With the new version of Windows 10 and it’s final release “Creators Update “Version 1709”, Windows came enhanced with a lot of great and optional features such as “OpenSSH Client / OpenSSH Server”.
In this guide I will explain step by step how you can install “OpenSSH” in Windows 10 and how also you can uninstall it, follow the below steps to guarantee a successful result.
Install OpenSSH Client
1. Click on the start menu, and then click on the settings icon.

2. From “Settings” window, click on “Apps”.

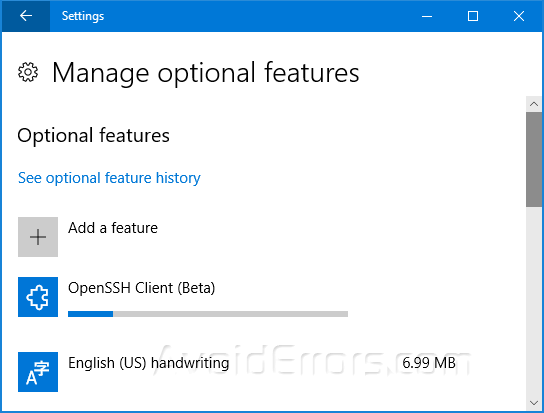
3. Click on “Manage optional features” in the right pane, after “Apps & Features” window appear.

4. To view more features, click on “Add a feature“.

5. Select “OpenSSH Client (Beta)” and then click “Install”.

6. You will notice that the new feature is being installed.
7. Once installation of “OpenSSH Client (Beta)” is done, you can run the command “ssh” in CMD, to make sure that the installation is done successfully.

Uninstall “OpenSSH Client”
1. Click on the start menu, and then click on the settings icon.
2. From “Settings” window, click on “Apps”.
3. Click on “Manage optional features” in the right pane, after “Apps & Features” window appear.
4. Click on “OpenSSH Client (Beta)” and then click “Uninstall”.

Summary
After this tutorial you should be able to know how you can install “OpenSSH Client” and how to uninstall it.


