AvoidErrors
  • HOME
  • WINDOWS
  • APPLE
  • MS OFFICE
  • RASPBERRY PI
  • WORDPRESS
  • TECH TIPS
  • LINUX
  • VIRTUALIZATION
  • FORUM
No Result
View All Result
AvoidErrors
No Result
View All Result

How to Install Windows 10 IoT Core on Raspberry Pi 3

Miguel by Miguel
July 8, 2017 - Updated on March 29, 2022
in Raspberry pi
0
Share on FacebookShare on Reddit
Download this tool to Recover Deleted Photos

Windows 10 IoT Core is a version of Windows 10 that is optimized for smaller low power devices like Raspberry Pi 2 and 3. Before getting started, make sure you are running Windows 10 1507 (version 10.0.10240) or later. In my case, I am running Windows 10 Anniversary Update.

It’s not Windows 10 as we know it from PCs or tablets, Windows 10 IoT Core is another branch of Microsoft’s OS designed to be run on low-power devices.

For for this tutorial im using Raspberry Pi 3. If you don’t have a Raspberry Pi I would personally recommend buying the Raspberry pi-3 kit.

Video Tutorial:

Install Windows 10 IoT Core on Raspberry Pi 3

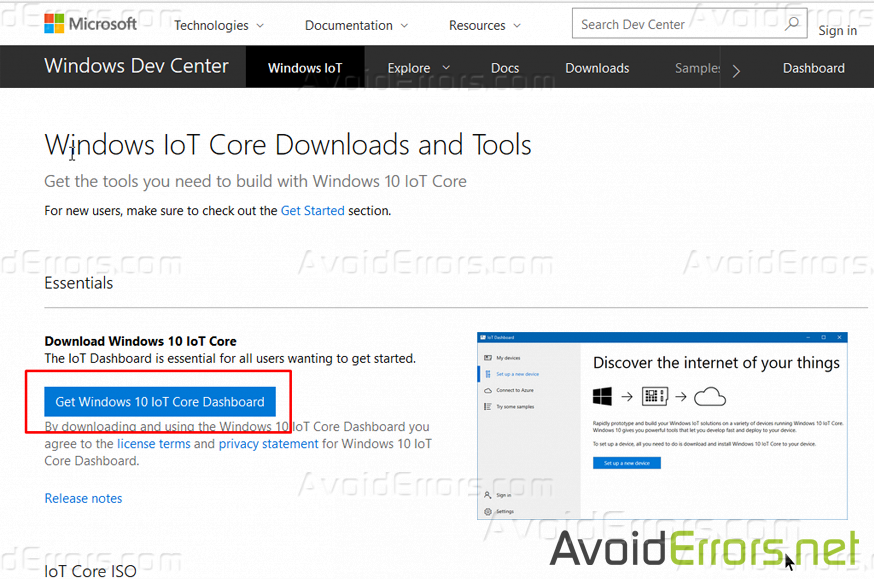
1. Go to the Windows 10 developer center website.

2. Download the application by clicking on Get Windows 10 IoT Core Dashboard.

3. Double click the downloaded setup.exe to install and run the application.

4. Select “Set up a new device” from the left pane.

5. Under “Set up a new device” Select the proper options. Make sure you select the correct USB drive for your microSD card then give your device a name and admin password. as shown in the image below:

6. Optional select the WiFi network connection you want your Raspberry Pi to connect to.

7. Check mark “I accept the software license terms” and then click on “Download and install” button.

The application will now download the necessary files from Microsoft and flash them to your microSD card. It’ll take a little while, but the dashboard will show you the progress.

Once you have imaged the microSD card, eject it from your PC and insert it to the Raspberry Pi. First connect the microUSB then all cables (Mouse, Keyboard, Ethernet and HDMI)  and lastly the power supply. Once it boots up you’ll be asked to choose a language and WiFi password to connect to the web. That’s about it

Previous Post

How to Stop macOS Sierra Startup Apps

Next Post

How to Generate New SID in Windows Server 2012

Miguel

Miguel

I started this tech blog back in 2011 as a place to write down processes I took to fix my client systems and network. Now I write some tips and tricks to help others with the tech issues that one might encounter.

Related Posts

How to Install Raspberry Pi Raspbian OS on a PC
Raspberry pi

How to Install Raspberry Pi Raspbian OS on a PC

by Miguel
April 29, 2022 - Updated on May 2, 2022
Remote Desktop Raspberry PI from Windows
Raspberry pi

Remote Desktop Raspberry PI from Windows

by Miguel
April 15, 2022 - Updated on April 16, 2022

Subscribe to get weekly tutorials direct to your inbox!

Disable Windows Defender SmartScreen – Windows 11
Windows

Fix Windows 11 Defender Not Working

by Rhousse
January 24, 2023
How to Fix 503 Service Unavailable Error in Windows 10 
Windows

Fix HTTP Error 503: The Service is Unavailable in Windows 11

by Rhousse
January 24, 2023
How to Modify Mouse Pointer in Windows 10
Windows

How to Fix Black Screen With Cursor in Windows 11

by Rhousse
January 24, 2023
Restore the Old Windows Desktop Icons – Windows 11
Windows

Fix and Enable Drag and Drop on Windows 11

by Rhousse
January 24, 2023


  • Disclaimer & Privacy Policy
  • FAQ
© 2022 Powered by Cloudways
No Result
View All Result
  • HOME
  • WINDOWS
  • APPLE
  • MS OFFICE
  • RASPBERRY PI
  • WORDPRESS
  • TECH TIPS
  • LINUX
  • VIRTUALIZATION
  • FORUM

© 2022 AvoidErrors Powered by Cloudways | Privacy

Welcome Back!

Login to your account below

Forgotten Password?

Retrieve your password

Please enter your username or email address to reset your password.

Log In
This website uses cookies. By continuing to use this website you are giving consent to cookies being used. Visit our Privacy and Cookie Policy.