AvoidErrors
  • HOME
  • WINDOWS
  • APPLE
  • MS OFFICE
  • RASPBERRY PI
  • WORDPRESS
  • TECH TIPS
  • LINUX
  • VIRTUALIZATION
  • FORUM
No Result
View All Result
AvoidErrors
No Result
View All Result

How to Migrate a Physical Workstation to ESXI Server

Miguel by Miguel
March 31, 2016 - Updated on March 29, 2022
in Virtualization
0
Share on FacebookShare on Reddit
Download this tool to Recover Deleted Files and Photos

Our goal is to turn a physical workstation whether is a Server, Windows or Linux  into a virtual machine and add it to a VMware ESXI server.

Video Tutorial:

Migrate a Physical Workstation to ESXI Server

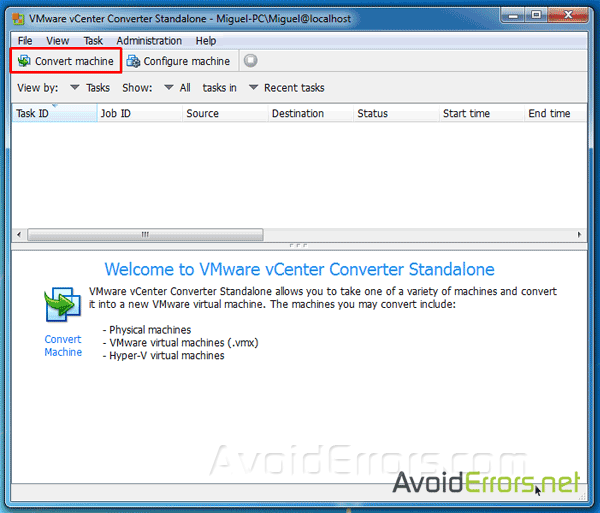
To get started, launch VMware vCenter Converter and click on Convert Machine.

Migrate-a-Physical-Workstation-to-ESXI-Server-5

This will start the Conversion wizard. The first step is to select the source machine you want to migrate.  Whether is (physical or virtual machine).

To convert a physical workstation to a virtual machine, select Powered-on next to “Select source type”.

Then from drop-down menu select if the remote workstation is a remote Windows or a Linux machine.

Migrate-a-Physical-Workstation-to-ESXI-Server-4

Specify the powered on machine by entering the IP address, the user name and password pertaining to the remote workstation.

Note: you can also select to migrate your own PC, a VMware Workstation VM, Hyper-V Server, and other third-party virtual machines using this method.

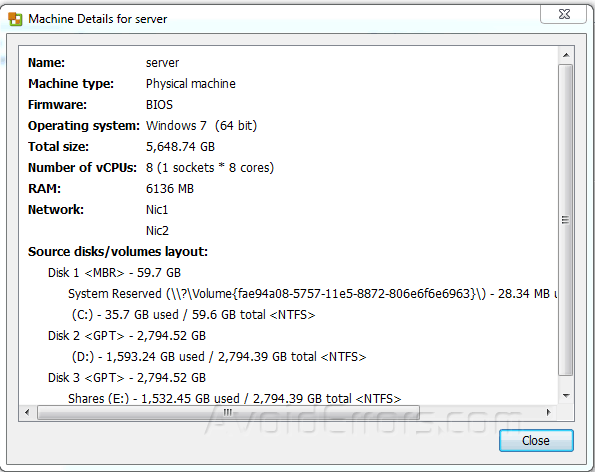
If you want to view the details of the selected physical machine click on “View source details…”. It shows general information about the source PC you’re migrating. Click close and Next button.

Migrate-a-Physical-Workstation-to-ESXI-Server-13

In next step, it will ask you to specify the destination type and VMware server details. Choose “VMware infrastructure virtual machine” option from the drop-down as destination type, under VMware infrastructure server details enter the IP address, the user name and password of the host Hypervisor ESXI server.

Migrate-a-Physical-Workstation-to-ESXI-Server-3

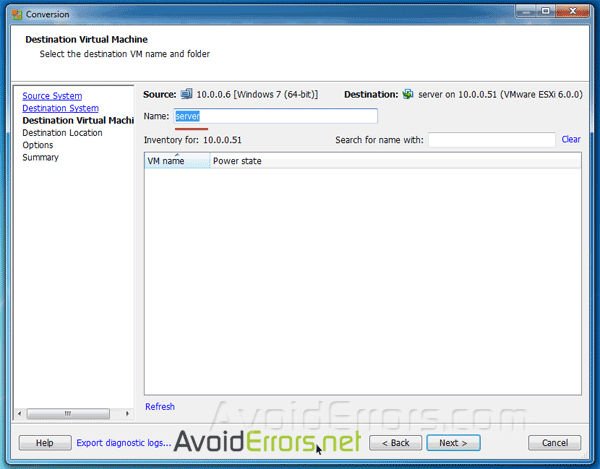
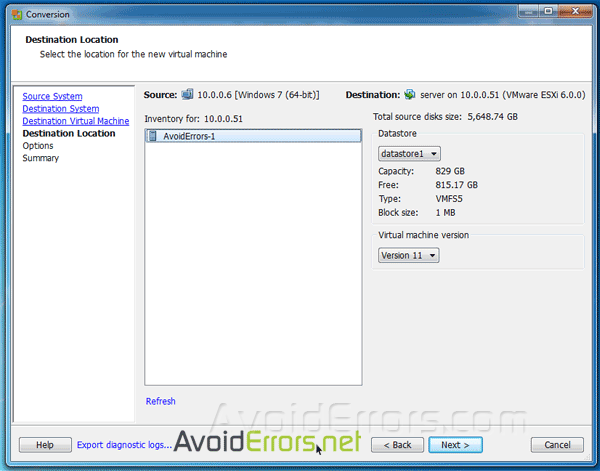
Now we have our Source machine and destination ESXI Server properly configured. Additionally you can change the default name to something other than the default and click on Next.

Migrate-a-Physical-Workstation-to-ESXI-Server-2

In case you are hosting multiple inventory and datastore make sure to select the proper one and continue. In this example I’m only hosting one inventory and datastore and its already preselected so Ill just click on next.

Migrate-a-Physical-Workstation-to-ESXI-Server-1

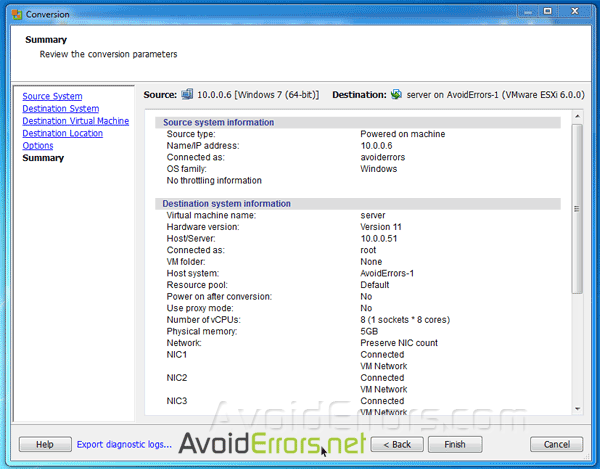
Once done, read the summary carefully and click finish to start migrating the physical machine.

Migrate-a-Physical-Workstation-to-ESXI-Server-12

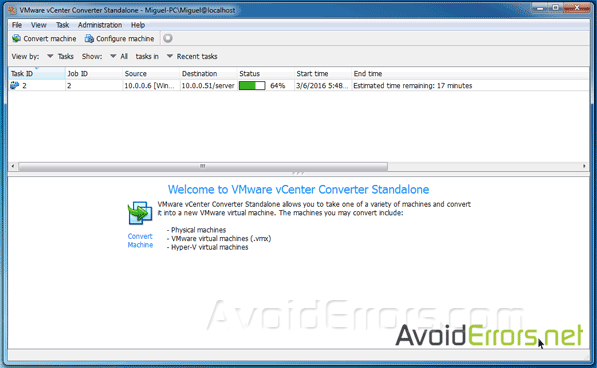
The migration process can take a while so go grab coffee until its done.

Migrate-a-Physical-Workstation-to-ESXI-Server-11

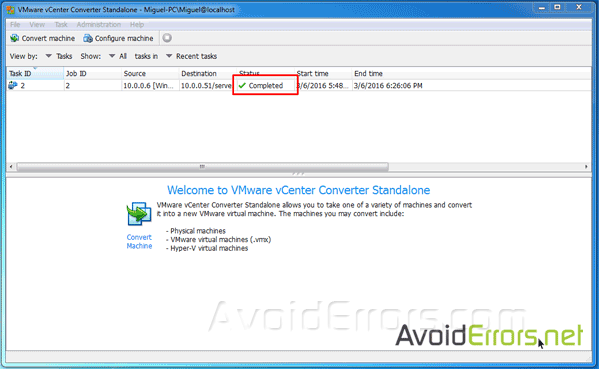
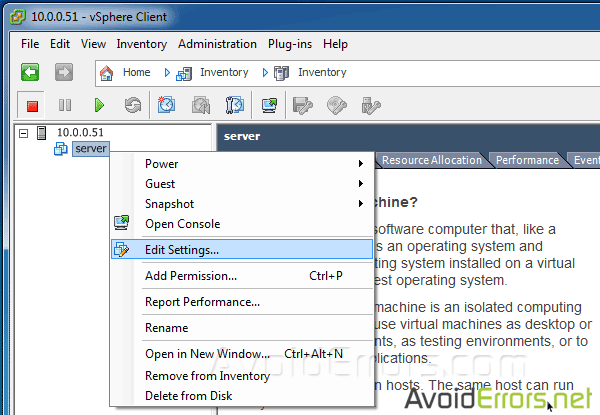
Once the physical machine has migrated to the ESXI server it will show on the inventory section, we now can customize the VM settings to either upgrade or downgrade depending on the purpose of use.

Migrate-a-Physical-Workstation-to-ESXI-Server-10

To customize the the VM right click it and select edit settings from the menu.

Migrate-a-Physical-Workstation-to-ESXI-Server-8

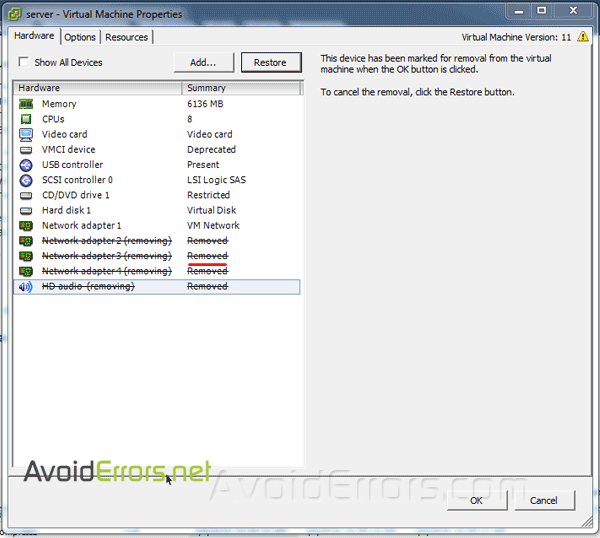
Here you can add and remove virtual hardware without spending money. Once done click on OK to save.

Migrate-a-Physical-Workstation-to-ESXI-Server-7

Once done customizing the VM, you can now run it, test it, and remove the physical machine from the network if needed.

Migrate-a-Physical-Workstation-to-ESXI-Server-6

Previous Post

How to Clone a Virtual Machine Without vCenter in ESXI 6 Free edition

Next Post

Fix No Internet Access on VirtualBox Windows XP

Miguel

Miguel

I started this tech blog back in 2011 as a place to write down processes I took to fix my client systems and network. Now I write some tips and tricks to help others with the tech issues that one might encounter.

Related Posts

Fix: “This PC Can’t Run Windows 11” Error – VirtualBox
Virtualization

Fix: “This PC Can’t Run Windows 11” Error – VirtualBox

by Rhousse
April 9, 2022
How to Clear Activity History In Windows 11
Apple

How to Run Windows 11 on a Mac

by Muhammad Imran Habib
November 4, 2021

Subscribe to get weekly tutorials direct to your inbox!

Disable Windows Defender SmartScreen – Windows 11
Windows

Fix Windows 11 Defender Not Working

by Rhousse
January 24, 2023
How to Fix 503 Service Unavailable Error in Windows 10 
Windows

Fix HTTP Error 503: The Service is Unavailable in Windows 11

by Rhousse
January 24, 2023
How to Modify Mouse Pointer in Windows 10
Windows

How to Fix Black Screen With Cursor in Windows 11

by Rhousse
January 24, 2023
Restore the Old Windows Desktop Icons – Windows 11
Windows

Fix and Enable Drag and Drop on Windows 11

by Rhousse
January 24, 2023


  • Disclaimer & Privacy Policy
  • FAQ
© 2022 Powered by Cloudways
No Result
View All Result
  • HOME
  • WINDOWS
  • APPLE
  • MS OFFICE
  • RASPBERRY PI
  • WORDPRESS
  • TECH TIPS
  • LINUX
  • VIRTUALIZATION
  • FORUM

© 2022 AvoidErrors Powered by Cloudways | Privacy

Welcome Back!

Login to your account below

Forgotten Password?

Retrieve your password

Please enter your username or email address to reset your password.

Log In
This website uses cookies. By continuing to use this website you are giving consent to cookies being used. Visit our Privacy and Cookie Policy.