Rename Devices In Device Manager
Lot’s of users may like to customize their windows machine and one of them is the naming of devices on device manager so today you can change the name using registry editor.
1. Press  + R and type devmgmt.msc in Run menu and press enter to open device manager.

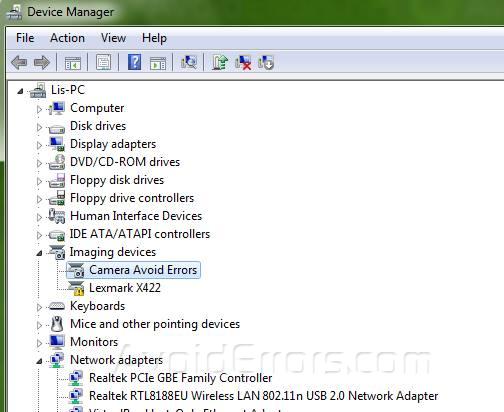
2. Look for the device you want to rename and right click on it and click on Properties.

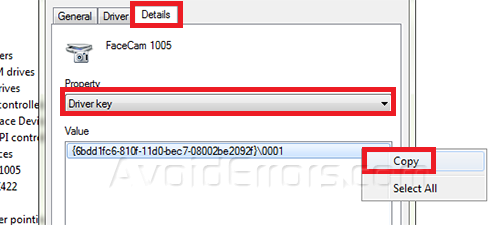
3. Now go to Details Tab and click on Property dropdown menu and select driver key and copy the key that appears.
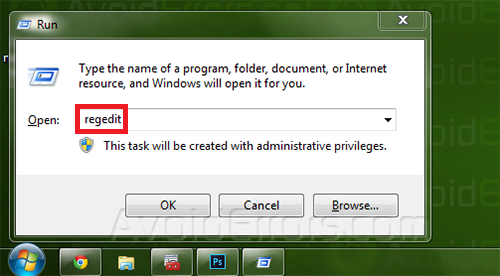
4. Press + R and write regedit in Run menu to open Registry Editor.
5. Now go to this directory HKEY_LOCAL_MACHINE -> SYSTEM -> ControlSet001 -> Enum and get permission on that folder, if you don’t know how to to get you can read in Take Ownership of a Registry Key
6. When you’re done taking the ownership of that registry folder click CTRL+F to search and paste the driver key that we have copied at step 3 and it will find the driver you want to rename and you select on friendly name below that one.

7. Double click on it and rename the second line with the name you wan’t to put on it and click on ok.

8. Now you can close registry and go to device manager and check if your name is changed
NOTE:You may need to restart your PC to see the changes or Scan for hardware changes


Now that’s what i call a “nice and short, very detailed guide”!!
Nice written!
Thanks for sharing this with the world. 🙂
Wonderful!!! Great tutorial!
WARNING!!!
Do NOT rename a USB Wifi-Adapter with this method. You won’t be able to see any wifi networks after a restart.
If you’ve done so, go into device manager, disable the network adapter and uninstall it. Plug it back in to a USB port and you should be able to connect again. You will have to re-enter your wifi passwords though.