AvoidErrors
  • HOME
  • WINDOWS
  • APPLE
  • MS OFFICE
  • RASPBERRY PI
  • WORDPRESS
  • TECH TIPS
  • LINUX
  • VIRTUALIZATION
  • FORUM
No Result
View All Result
AvoidErrors
No Result
View All Result

Set up Time Machine on a Mac to make Regular backups

Abdelrahman Reda by Abdelrahman Reda
September 4, 2018
in Apple
0
Share on FacebookShare on Reddit
RECOMMENDED: Improve PC performance Migrate to Solid State Drive (SSD)

A backup is a lifebuoy, which will help you not to loose any documents, family photos, and favorite games when one day a hard drive breaks down. The creation of backups can be configured in a few mouse clicks, great advantage of Mac computers.

Today, Ill show you how to start using a Time Machine and what you need for this.

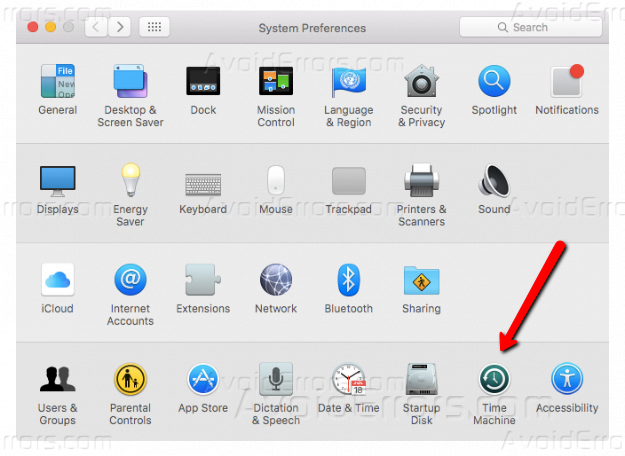
Open the “System Preferences” menu and find the Time Machine item at the bottom.

Important! To make a backup, you will need an external drive connected via USB or Thunderbolt connector.

Other possible options are the AirPort Extreme router in a pair of the hard drive, Time Capsule or server with the MacOS.

Make sure that the device you selected is turned on and running. The Time Machine options menu is simple. You can select a disk for backups, configure their automatic creation, display the function in the menu bar and see usage statistics.

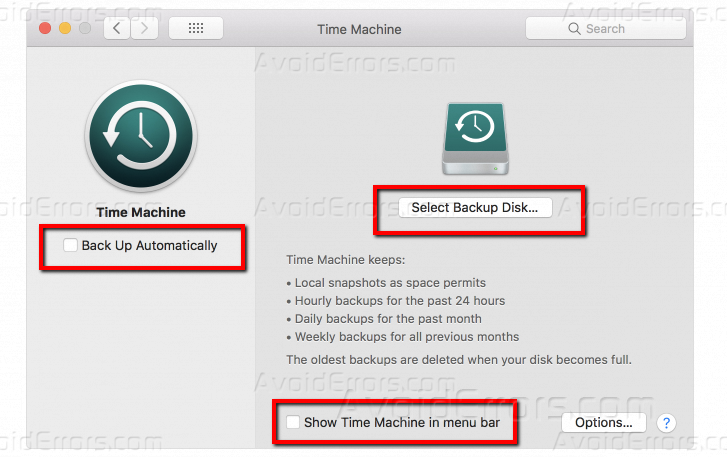
Before starting the backup process, click on the “Options” and exclude from the backup list that directories which you don’t want to back up.

For example, if you use iCloud Drive and synchronize files from the desktop and a folder with documents with all your devices, you do not need to back up it in Time Machine.

As soon as you decided on the data for backup, click on the button “Select Backup Disk“, then from the list of available devices find the suitable one and click “Use Disk“.

If you are worried about the security of the data, you can check the box next to “Encrypt Backups“. Then no one will be able to access your backup copy without a password.

The speed of the backup depends on the amount of data, the type of connection and the speed of the external hard drive. When the backup process ends you will see the notification. We hope that this instruction will help you not to lose data on your Mac.

Previous Post

How to Install WordPress on Ubuntu Server 18.04

Next Post

How to Detect Hardware Problems on Apple Computers

Abdelrahman Reda

Abdelrahman Reda

Abdelrahman Reda is a Motivated Support Engineer with 6+ years of corporate and consumer support experience. His experience related to administration of Network, NOC support, computers and anti-virus server, data entry, networking sites, remote support.

Related Posts

How to Share Notes and Folders with Family and Friends on iPhone or iPad
Apple

How to Recover Previously Deleted Notes on iPhone or iPad

by Ori Otokpa
July 25, 2022
How To Set Custom Vibrations on iPhone or iPad
Apple

How To Set Custom Vibrations on iPhone or iPad

by Ori Otokpa
July 25, 2022

Subscribe to get weekly tutorials direct to your inbox!

Windows

Fix .net Framework 3.5 Missing on Windows 11

by Rhousse
August 13, 2022
Clean Install Windows 11 Without USB
Windows

How to turn off Delivery Optimization on Windows 11

by Muhammad Imran Habib
August 13, 2022
How to Enable Dark Mode on Windows 11
Windows

How to Prevent Users from Changing Proxy Settings in Windows 11

by Muhammad Imran Habib
August 13, 2022
How to Check Laptop Battery Details in Windows 10
Windows

How to Create a New Custom Power Plan in Windows 11

by Muhammad Imran Habib
August 13, 2022
  • Disclaimer & Privacy Policy
  • FAQ
© 2022 Powered by Cloudways
No Result
View All Result
  • HOME
  • WINDOWS
  • APPLE
  • MS OFFICE
  • RASPBERRY PI
  • WORDPRESS
  • TECH TIPS
  • LINUX
  • VIRTUALIZATION
  • FORUM

© 2022 AvoidErrors Powered by Cloudways | Privacy

Welcome Back!

Login to your account below

Forgotten Password?

Retrieve your password

Please enter your username or email address to reset your password.

Log In
This website uses cookies. By continuing to use this website you are giving consent to cookies being used. Visit our Privacy and Cookie Policy.