Setup Camera Privacy – Windows 10
You might have seen that some of the peoples have pasted a piece of tape or sticker on their laptop camera because of privacy concern. They might be right, that any application can access the camera without a notification.
Windows 10 solves this problem by allowing its users to set up privacy and other customization options for the camera, so that users can set up the permission like which application can access the camera and which one will not. You can also disable the camera access for all the applications. To set up the camera privacy settings, follow the following options.
Setup Camera Privacy In Windows 10
Click on the start menu and type Settings. On the top, you will see settings. Click it to open the settings of the windows.

Once you have opened settings windows, click on privacy option in settings.

This will open general privacy settings for your windows, there are many options available.

On the left navigation bar, scroll down to a camera.

On the right side of the windows, you will get privacy settings related to the camera.
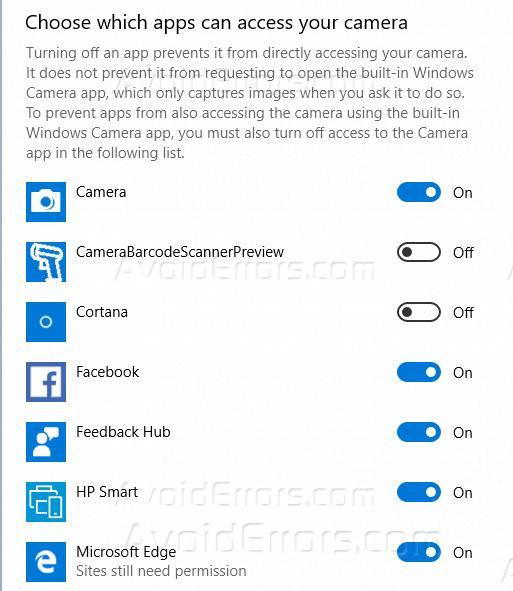
Here you will have many options related to privacy settings of your camera, like “Allow access to the camera on this device” which means that users who are using this device will have access to the camera attached with the device.

You can also allow and disallow the camera access to many of the applications. All the application accessing camera will be listed, toggle the option to turn it on or off as per your needs.
Close this options window and new settings have been applied to the camera, now the camera will only be accessible to the apps you have allowed access the camera.
This brings the piece of mind when it comes to privacy-related to the camera.


