How to Setup DNS in Ubuntu
Previously, to configure the DNS servers to be used by the system, it was enough to enter the addresses of the required servers in the /etc/resolv.conf file. But now Network Manager manages the entire network configuration in Ubuntu, and this file is now only a link to the Network Manager.
This method still works, but in it, you can configure DNS on the LiveCD, or till rebooting. After the reboot, all the settings will reset and you will have to do everything again. Therefore, in order to preserve everything, you need to perform all actions through the Network Manager interface.
Click on the Network icon and choose “Edit Connections”.

Select your connection and click “Edit”.

In the next window click on “IPv4 settings” tab.

Then on the “Method” field choose “Automatic (DHCP)”
Now in the “Additional DNS servers,” you can add necessary DNS servers.
Several DNS addresses can be separated by commas. For example, you can use Google DNS.
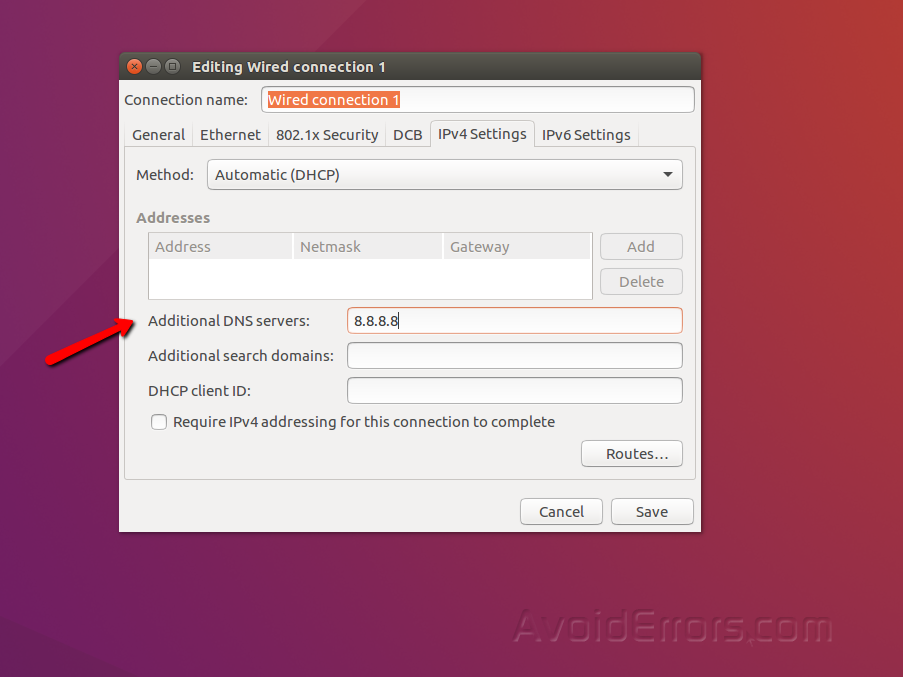
Then you should click “Save” and can close that window.
Now you should reconnect to that connection and can check the current DNS server:
Open the Terminal and execute the following command
Nslookup avoiderrors.com

DNS Setup trough Ubuntu Terminal
Ubuntu has a unified network configuration interface that is configured via the configuration file
/ etc / network / interfaces.
Open the file for editing in the Terminal and find in it the name of your network interface, for example, “auto enp0s3”, if there is no such section, you need to add it:
sudo vi /etc/network/interfaces
auto enp0s3
iface enp0s3 inet dhcp
dns-nameserver 8.8.8.8
Here, the address 8.8.8.8 is the address of your DNS server. But this setting will work only if your DHCP client is not trying to assign an address automatically. To specify the DNS address at the DHCP server level, add the following line to the /etc/dhcp/dhclient.conf configuration file:
sudo vi /etc/dhcp/dhclient.conf
supersede domain-name-servers 8.8.8.8
To be sure, you can add your DNS server addresses to the /etc/resolvconf/resolv.conf.d/base file:
sudo vi /etc/resolvconf/resolv.conf.d/base
nameserver 8.8.8.8
After you should restart the network.
sudo systemctl restart networking
Now you can open /etc/resolv.conf and check that the new DNS address has been applied.


