How to Take a ScreenShot using Snipping tool in Windows 7/8.1/10
Screenshots is an important feature as it helps us to share a lot of information through pictures. When we’re writing an article or any procedure is a guide for the user we attach a lot of pictures in the form of screenshots as they are real pictures of software and help users to understand things quickly.
There are many ways to take screenshots in Windows some of them are a built-in feature and for advance screenshots, we can use third party software’s.
To take a full window or full-screen screenshot all you need to do is just press the print screen button on your keyboard. On laptops, you may find print screen button to function properly in a combination of function key like pressing a function key and then a print screen button will take a screenshot of the contents of the screen and it will automatically be copied to the clipboard from where you can add it into any software, like MS Word, Paint etc.
There is Windows built-in advanced tool which helps to take screenshots as per your requirement like taking a screenshot of a small portion of the window or taking a screenshot of error or warning popup. That tool is called snipping tool.
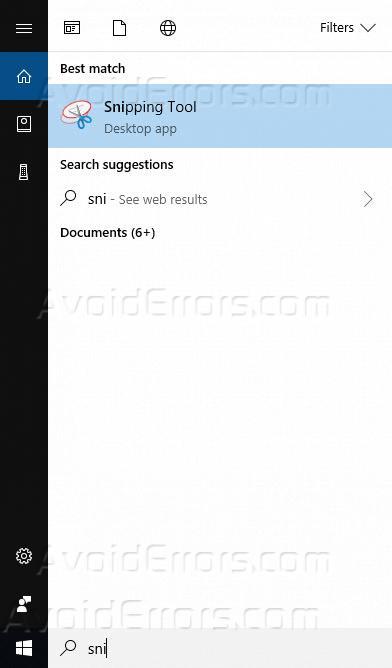
Click on start menu and start typing snipping tool it will open snipping tool so that you can take a screenshot as per your requirements.
To take a new screenshot from snipping tool click on new and it will allow you to capture area of your screen just hold the right button of your mouse and select the area you want to take as a screenshot.
It will first blur the screen and once you will start selecting the content, it will make that visible.

Once done with a screenshot, it will show a preview and some basic editing options.

Click on Save to save the screenshot or close the preview window and it will ask you to save the screenshot, Select Yes to proceed with saving.

There are other options to take a screenshot using snipping tool like you can set If you want to take a screenshot in rectangle shape free shape.

You can also select the option to take a screenshot with the delay by selecting a delay option this will help you to move your cursor point to a position where you want to take a screenshot and a screenshot will automatically enable snipping tool for you to get a screenshot.

There are many other screenshots taking tools available some of them are free and there are others which you have to buy. You can use lightshot, Greenshot, Jing, Gadwin, and Snagit.
Some tools provide online storage easy sharing and collaboration option and image editing like highlighting the content blurring the content and setting up popup dialogue on the image.

Hope this guide will help you to get a screen shot easily.


