How to Install DietPi ownCloud on a Mini PC
Our goal is to install the latest ownCloud version on a Mini PC with DietPi installed. We are not just installing ownCloud but also mounting an external drive for lager capacity of data storage and to be able to access it with your mobile device from anywhere in the world with internet access.
This tutorial assumes that you have a fully functional Mini PC.
There are many ways to install ownCloud onto a Mini PC. This particular tutorial I’ll be downloading and installing the following software / packages we will be using to setup the latest ownCloud version:
- Install DietPi
- Auto Install ownCloud “No codes required“
- Mount an External Hard drive for larger storage capacity
- Access ownCloud
If you don’t have a Mini PC. I would personally recommend buying the Z83-F Mini PC which is the one I’m using for this tutorial.
The good thing is that with DietPi We don’t have to write a bunch of code like I’ve done on my previous ownCloud installations. With DietPi we auto install ownCloud.
Video Tutorial:
Install Diet Pi
Plug in a USB Flash drive to the PC and make sure is properly detected by the PC.
Download the Native PC (UEFI) Image from https://www.dietpi.com/ -> Downloads.


- Under Partition scheme, select GPT partition scheme for UEFI
- Select the DietPi.iso image
- Click start to write the DietPi image
- Then Click on Write button to write the content of the image file onto the USB.
Once done properly eject the USB from the PC and plug it into the Mini PC.
Boot from the USB. Enter BIOS and select USB flash drive as the 1st boot device, save and exit BIOS.
- Select “Install DietPi mmcblk0” (if you have an onboard EMMC chip)
- Select “Install DietPi sda” (to install on the 1st HDD as detected by BIOS/clonezilla, unfortunately, we have no way of providing this info on screen, use with caution)
Once the Mini PC turns on you will immediately be able to see the IP address, please make a note of it.

Then you’ll be prompted for the default username and password:
- User: root
- Password: dietpi
Once you log in it will immediately start to update. You are also going to be prompted to change default passwords.

This can take quite a while. For this tutorial I did not change any passwords. I also opted out of the survey when prompted.

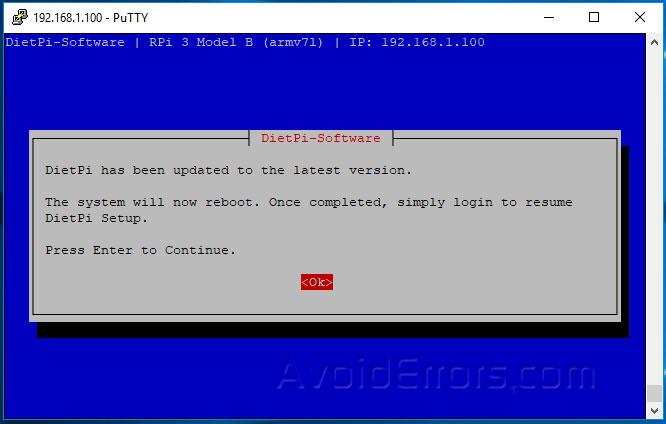
Once done reboot. DiepPi will be installed and updated.
Install owCloud
Upon reboot you’ll be prompted with the DietPi-Software screen:

Select Software Optimized hit enter.
Now using the ↓ arrow key look for ownCloud. Select it by pressing the space bar.

Then press the tab key to select OK and hit enter. It will bring you back to the DietPi-Software screen:
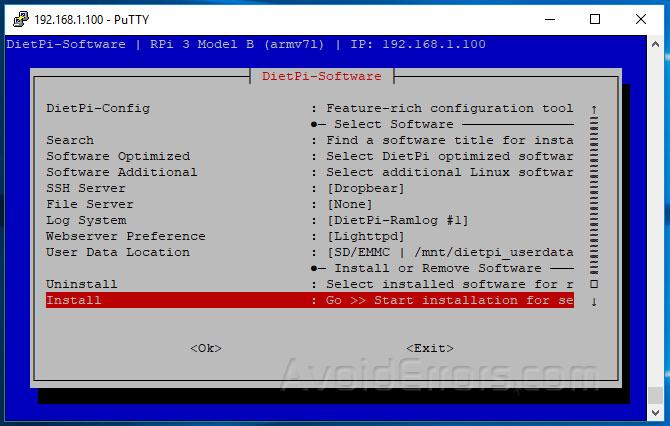
Again using the ↓ arrow key select Install and hit enter, to start auto installing the latest version of ownCloud. Let the PC reboot. You are finished installing ownCloud.
Basic First Access Setup
Go on another computer within the same network and open the browser, enter the IP address provided, in my case is http://192.168.1.100/owncloud you’ll be directed to your ownCloud web interface .
Note: If you’re mounting and external hard drive for additional storage capacity skip this step and continue to Create a MySQL database then Mounting and Setting up an external hard drive underneath.
You should be presented with a simple login screen, Here enter the default username and password.
- User: admin
- Password: dietpi

Note: If the default password doesn’t work then you would need to reset it. To do that go back to the DietPi and enter the following:
sudo -u www-data php /var/www/owncloud/occ user:resetpassword admin
If in case the proper ownCloud setup screen does not appear, then we need to delete the config.php by running this command:
rm /var/www/owncloud/config/config.php
Now you’ll be prompted with the proper ownCloud setup screen.

Create a MySQL database and user:
mysql -u root -pdietpi
Create a database
create database own_cloud;
Create user for database
GRANT ALL PRIVILEGES ON own_cloud.* TO 'oc_admin'@'localhost' IDENTIFIED BY '12345';
Change password to something other than “12345”
exit

Mounting and Setting up an external hard drive
These instructions are for mounting an NTFS formatted hard drive and allowing ownCloud to store files onto it. Now would be a good time to plug in the external Hard Drive to the Mini PC.
The advantage of using an NTFS formatted drive is that in case something ever happens to my Mini PC I can easily unplug the external hard drive, plug it onto a PC and have access to all my files.
1. Having an NTFS drive we will need to install a NFTS package by entering the following:
sudo apt-get install ntfs-3g -y
See installed USB external hard drive:
sudo fdisk -l

2. Make a directory we can mount to:
sudo mkdir /mnt/ownclouddrive
Mount the hard drive to the newly created directory “/mnt/ownclouddrive”
sudo mount /dev/sda1 /mnt/ownclouddrive
3. Create and add the www-data user to the www-data group:
sudo groupadd www-data
sudo usermod -a -G www-data www-data
4. Make the user www-data owner of the mounted drive and make its permissions read, write and execute:
sudo chown -R www-data:www-data /mnt/ownclouddrive
sudo chmod -R 775 /mnt/ownclouddrive

5. Now we need to get the gid, uid and the uuid as we will need to use them so the pi will remember it even if we plug it into a different USB port. Enter the following command for the gid:
id -g www-data
6. Now to get the uid enter the following command:
id -u www-data
7. Also we meed to get the UUID of the attached external hard drive so the Pi can remember this drive even if you plug it into a different USB port.
ls -l /dev/disk/by-uuid

Now add your drive into the fstab file so it’ll boot with the proper permissions.
sudo nano /etc/fstab
Add the following line to the bottom of the file, updating uid, guid and the UUID with the values we got above. (It should all be a single line). Dont forget to replace the UUID number to yours in stead of the one you copied from here.
UUID=80264F31264F278C /mnt/ownclouddrive auto nofail,uid=33,gid=33,umask=0027,dmask=0027,noatime 0 0

Reboot the Mini PC:
sudo reboot
Now the drives should automatically be mounted. If mounted we’re all good to go. To check it enter:
sudo ls /mnt/ownclouddrive
If there are files inside the drive you should be able to see them here. If it’s an empty drive you might not see anything so don’t be surprise if nothing shows up.
Basic First Access Setup
Open your browser and enter the IP address provided, in my case is 192.168.1.140/0wncloud you’ll be directed to your ownCloud storage server.
You should be presented with a simple setup screen, Here enter a username and password to create an admin account.
Click on Storage & database dropdown and enter your external hard drive directory: /media/ownclouddrive (Skip this if you didn’t setup an external drive).
Immediately underneath enter your MySQL details as follow:
- Username: admin
- Password: dietpi
- Data folder: /mnt/ownclouddrive
- Database user: oc_admin
- Database password: 12345
- Database name:own_cloud
- Server: localhost
Click on ‘Finish Setup’ button. That’s it. We’re good to go. Owncloud 10 installed on Raspbian Stretch is now ready for use.

Done! !! all is left is to configure your devices to access your ownCloud storage.
External Access Port Forward
To allow devices like your phone or tablet to access your cloud from anywhere in the world with internet access:
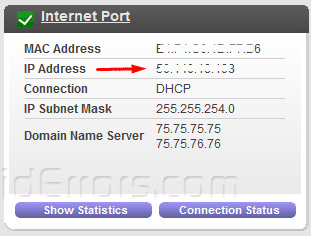
Log into your router and get the WAN IP address:
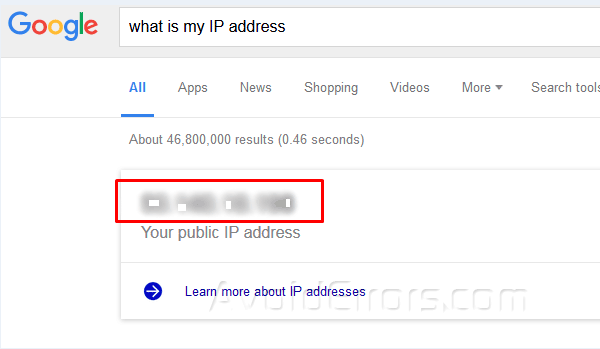
Or Google what is my IP address?
Configure Trusted Domains
We’re going to edit this config file and add the WAN IP to your trusted IP list and not to be overwritten by ownCloud. To do this open the Owncloud config file, enter:
nano /var/www/owncloud/config/config.php
Here add the WAN IP (External IP address) you just got from the router or Google to the trusted domains array. Your new entry should look something like this:
1 => 'xxx.xxx.xxx.xxx',
X are just placeholders. Replace the X’s with the WAN IP Address.
Now update the URL of the overwrite.cli.url line with your WAN IP Address. It should look something like this:
'overwrite.cli.url' => 'https://xxx.xxx.xxx.xxx/owncloud',
Here is an example of the completed config.php file.

Once done, save and exit.
Now log into your router and navigate to the port forward section.
Port forward port 80 to the Mini PC internal IP (LAN IP) address and save settings.

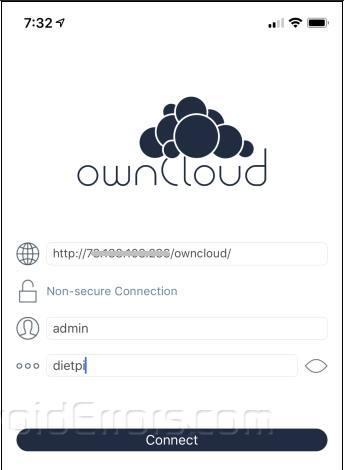
Now your DietPi ownCloud is ready to be accessed externally (WAN) and from your devices just download the ownCloud App and enter: “http:// WAN IP Address/owncloud” on the address bar or devices. below is an example:
That’s it – you now have cloud storage that works from anywhere in the world with internet access.


