Enable Group Policy (gpedit.msc) on Windows 10 Home Edition
Group Policy is an important tool for the Microsoft Windows family of operating systems that control everything from the working environment of user accounts and computer accounts policies.
In this tutorial, am going to explain step by step how you can enable Group Policy on Windows 10 Home Editions, as it’s known that Windows 10 Home hasn’t a group policy and that’s become a big matter for the IT users and workers, but no there is nothing to worry about, “AvoidErrors” found the solution for you just follow the below steps to learn how you can enable Group Policy in Windows 10 home editions with a third party software.
1. Download the add_gpedit_msc zip file containing all the components to enable the group policy feature on Windows 10 Home

2. Extract the downloaded file and run the setup.exe.

3. Keep clicking “Next” till you reach the installation page and click “Install”, and once the installation is complete click “Finish”.

4. Open “This PC” and navigate to the temp folder on your windows directory and locate the folder “gpedit” and open it, just like the below screenshot.

5. Right click on the installer file, and click “Run as Administrator”.

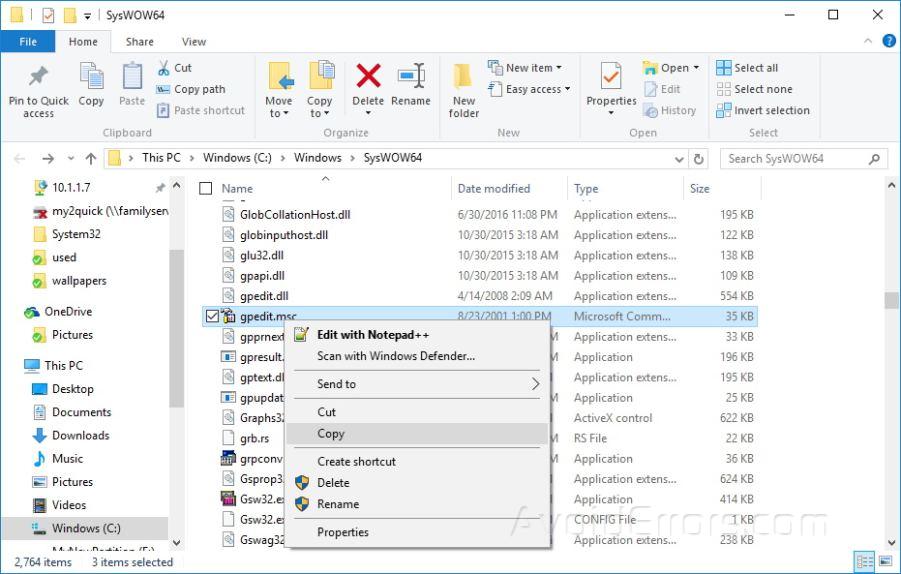
6. Now, Go to the following directory “C:\Windows\SysWOW64” and copy the file “gpedit.msc”.
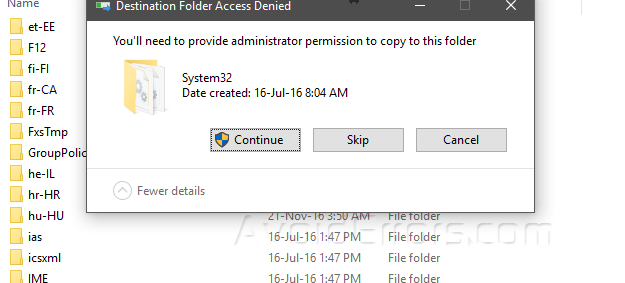
7. Paste the copied file into the directory “C:\Windows\System32” on the popup confirmation click on “Continue” just like the below screenshot.
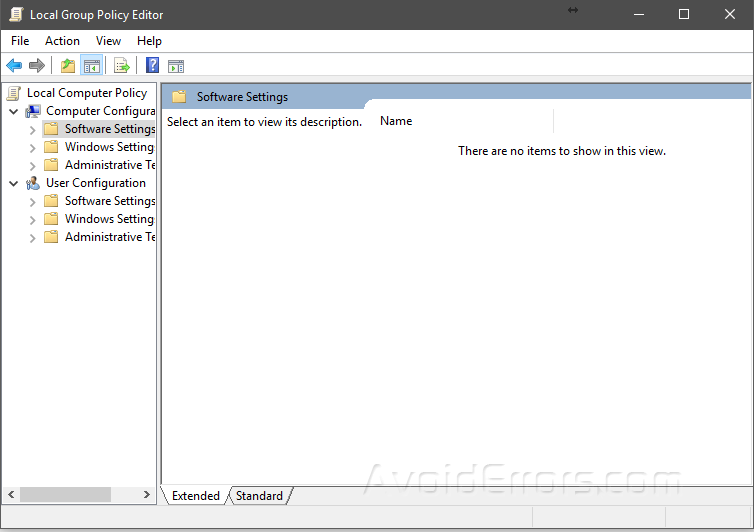
8. From the run command, type “gpedit.msc” and the group policy editor will open with you.

9. Kindly note that the group policy editor wasn’t intended to be part of Windows 10 Home. That mean that you may not have all the same options that are available for Windows 10 Pro and so other versions.