AvoidErrors
  • HOME
  • WINDOWS
  • APPLE
  • MS OFFICE
  • RASPBERRY PI
  • WORDPRESS
  • TECH TIPS
  • LINUX
  • VIRTUALIZATION
  • FORUM
No Result
View All Result
AvoidErrors
No Result
View All Result

How to Create a Variable Product – Woo Commerce

Abdelrahman Reda by Abdelrahman Reda
May 17, 2019
in WordPress
0
Share on FacebookShare on Reddit
Transfer Windows and Installed Data to Another Hard Drive

In this tutorial, we are going to learn how to create a variable product for a T-shirt.

1. To create a variable product, choose Product from the Add New drop-down menu.

2. Enter your new product name and description. Under Product Data, change the product type to Variable Product.

Leave SKU as blank since you will be using variations.

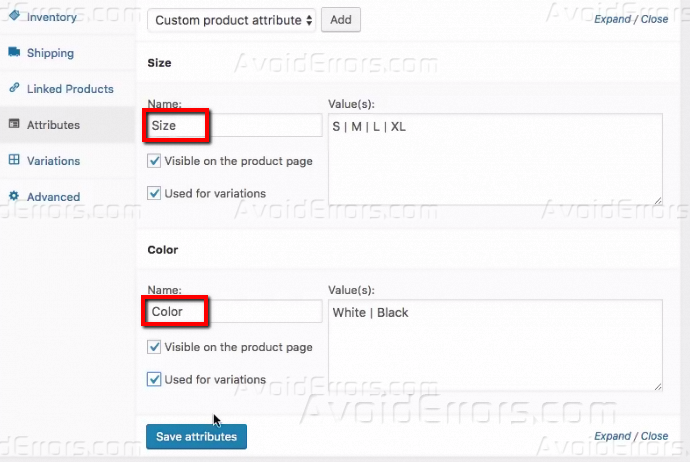
3. Navigate to the Attributes tab and click on Add.

4. Add different attributes for ‘Colour’ and ‘Size’ and then Click on ‘Save attributes’. Tick on the options to have the attribute visible on the product page and to be used for variations.

5. Click on the ‘Variations’ From the Variation options, choose ‘Create Variations from all attributes’ then click on Go.

6. You will get a notification message asking you if you are sure to create variations from all attributes. Click OK.

7. Click OK after you get confirmation that the variations have been added.

8. The variations have been added.

9. To expand all variations, click on Expand. Enter all information for all the products including product images in order for them to be visible on the product page. Once done, click on Save changes and then Publish.

10. To add a regular price for all your variations, Select Set regular prices from the Add variation drop down menu and then click on Go.

11. Enter the price in the value box and then click OK. To save everything, Click on Expand the variations, you will notice that the regular price has been filled on all products.

12. This is how the product will appear on the front-end.

13. You can run a variation to manage stock by going to Variation and choosing Toggle Manage stock from the Add variation drop down menu and then click Go.

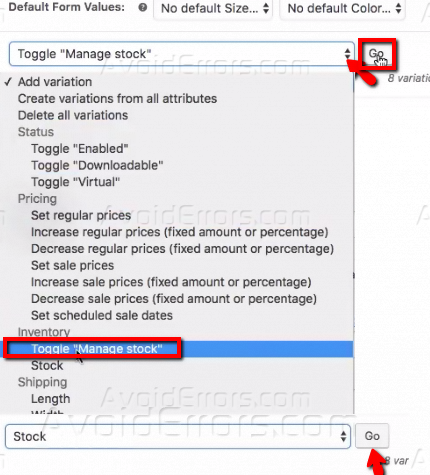
14. After Toggling Manage Stock, select stock and then click Go to enter Stock values.

15. Enter the stock values and click OK and update the product page.

16. Refresh the product page on the front-end to view changes. Product variations have been created successfully.


Previous Post

How to fix a Frozen Windows 10 Desktop

Next Post

How to Back up your Data Automatically – Windows 10

Abdelrahman Reda

Abdelrahman Reda

Abdelrahman Reda is a Motivated Support Engineer with 6+ years of corporate and consumer support experience. His experience related to administration of Network, NOC support, computers and anti-virus server, data entry, networking sites, remote support.

Related Posts

How to Install a WordPress Plugin
WordPress

How to Install a WordPress Plugin

by Muhammad Imran Habib
October 18, 2021
How to Install a WordPress Theme
WordPress

How to Install a WordPress Theme

by Muhammad Imran Habib
October 18, 2021

Subscribe to get weekly tutorials direct to your inbox!

Disable Windows Defender SmartScreen – Windows 11
Windows

Fix Windows 11 Defender Not Working

by Rhousse
January 24, 2023
How to Fix 503 Service Unavailable Error in Windows 10 
Windows

Fix HTTP Error 503: The Service is Unavailable in Windows 11

by Rhousse
January 24, 2023
How to Modify Mouse Pointer in Windows 10
Windows

How to Fix Black Screen With Cursor in Windows 11

by Rhousse
January 24, 2023
Restore the Old Windows Desktop Icons – Windows 11
Windows

Fix and Enable Drag and Drop on Windows 11

by Rhousse
January 24, 2023


  • Disclaimer & Privacy Policy
  • FAQ
© 2022 Powered by Cloudways
No Result
View All Result
  • HOME
  • WINDOWS
  • APPLE
  • MS OFFICE
  • RASPBERRY PI
  • WORDPRESS
  • TECH TIPS
  • LINUX
  • VIRTUALIZATION
  • FORUM

© 2022 AvoidErrors Powered by Cloudways | Privacy

Welcome Back!

Login to your account below

Forgotten Password?

Retrieve your password

Please enter your username or email address to reset your password.

Log In
This website uses cookies. By continuing to use this website you are giving consent to cookies being used. Visit our Privacy and Cookie Policy.