How to Enable / Disable Camera (or Webcam) Windows 10
If your Windows 10 webcam does not work this can be due to a number of reasons. The main one is that you haven’t given permission for the app to access the camera. Before you try any trouble shooting I suggest you first allow apps to access your camera.
If you have a computer with an integrated cam or a USB webcam and you just want to disable it because you are concerned about your privacy you can disable it easily and without using any additional software.
This guide will help you Enable / Disable the camera simply follow our guide.
Enable Camera (or Webcam) Using Windows 10 Settings
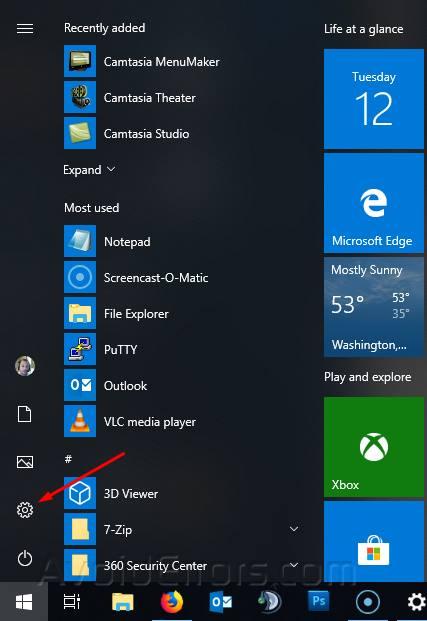
1. Open Start and click on Settings
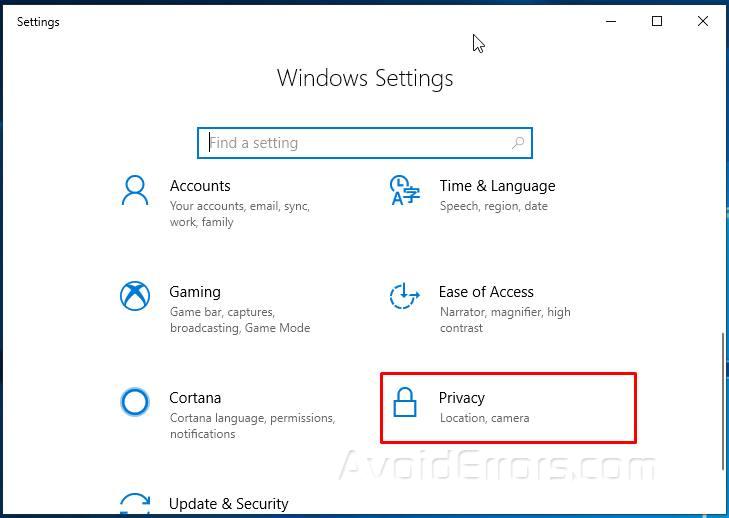
2. Select Privacy
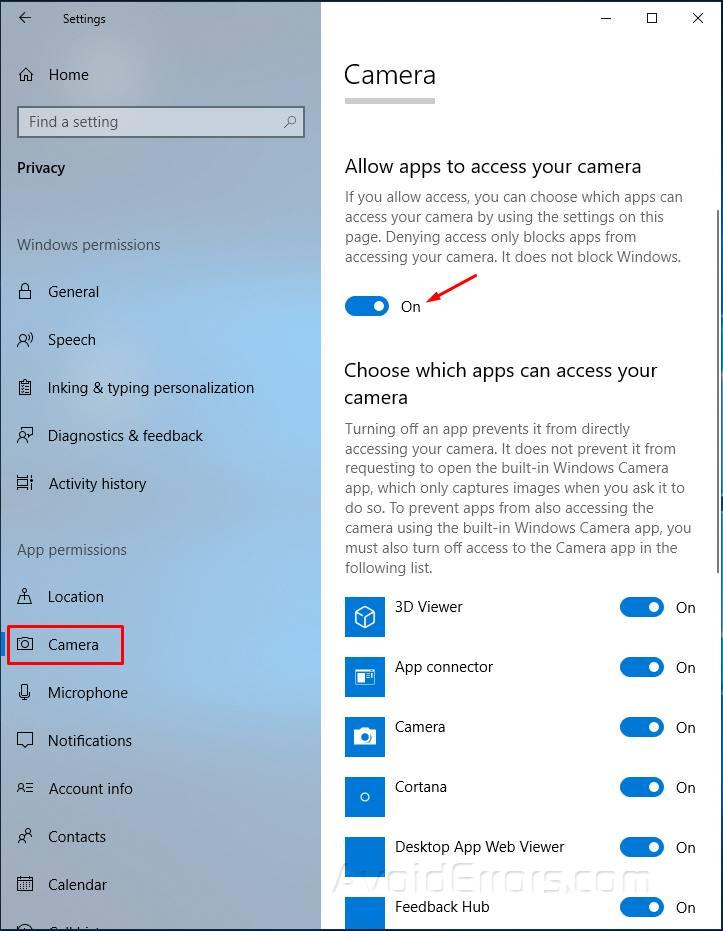
3. Select Camera tab from the left. Under Allow apps to open your camera move the toggle to On, and underneath using the on or off toggle choose which apps can use your camera. If unsure turn them all on it doesn’t have any negative effect on the PC.
Completely Disable Camera Using Device Manager:
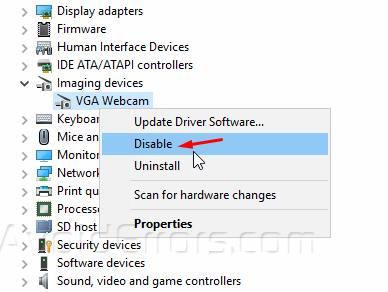
1. Press Windows key + R to open the Run box, then type in devmgmt.msc and press enter to open it

2. Find Imaging Devices expand it, you will see Integrated Camera, right click on it and Disable.
If you want to enable your camera again, repeat the same process but in the end select Enable.


