How To Install and Configure Chef Server on Ubuntu 16.04
“Chef” is an open source configuration management and automation tool written in Ruby and Erlang that is used to manage your IT infrastructure from a centralized location. Chef Automate provides enterprise capabilities that let you do even more with Chef.
Chef Automate includes a continuous deployment pipeline for infrastructure and applications, automated testing for compliance and security, as well as dashboards and reports for troubleshooting, auditing, and management. Make better, faster deployment decisions by putting reliable and timely information at the fingertips of decision makers. Achieve safety and velocity with Chef Automate.
Follow the below steps to successfully install “Chef” server on your Linux Ubuntu 16.04
Download and install Chef Server
1. Update all your current system packages using the command “sudo apt-get update“.

2. Download “Chef” packages by using the below command.
sudo wget https://packages.chef.io/files/stable/chef-server/12.15.8/ubuntu/16.04/chef-server-core_12.15.8-1_amd64.deb

3. Run the following command to start the installation process of “Chef” server.
sudo dpkg -i chef-server-core_12.15.8-1_amd64.deb

4. Once “Chef” Server is installed successfully, you will need to configure it. “Chef” server main configuration file located on “/etc/opscode/chef-server.rb” that contains additional settings. You can leave this file empty, but it is recommended to configure chef server with a hostname that’s accessible from outside network.
Configure “Chef” Server
1. Check the current status of “Chef” server by the below command.
sudo chef-server-ctl status

2. Use the below command to install the management console as it’s web based feature and it’s used to manage Chef server.
sudo chef-server-ctl install chef-manage sudo chef-server-ctl reconfigure sudo chef-manage-ctl reconfigure

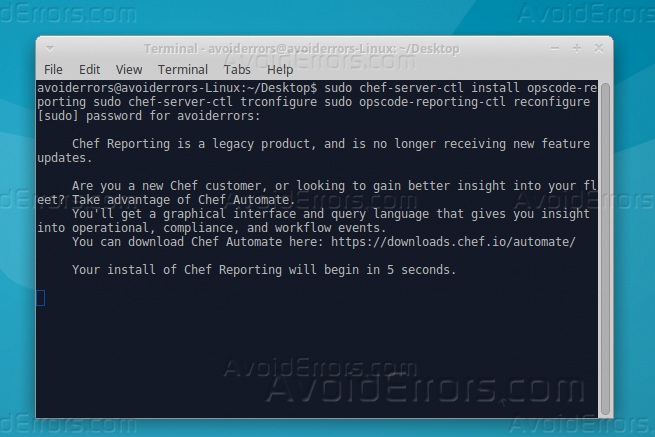
3. Install reporting features by running the below command.
sudo chef-server-ctl install opscode-reporting sudo chef-server-ctl reconfigure sudo opscode-reporting-ctl reconfigure
4. Create a directory where all the keys will be stored on it, create by using the below command.
sudo mkdir .chef

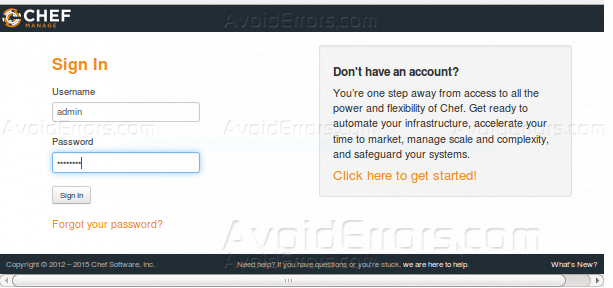
5. Create admin user to use it with the management console on Chef server by the below command.
sudo chef-server-ctl user-create admin admin admin [email protected] password -f ~/.chef/admin.pem

6. You can access the web interface of “Chef” server by opening the URL “http://chef-server-ip” from your favorite web browser and use the created user to log in.
Summary
After this tutorial you should be able to know how you can install “Chef” server on Ubuntu 16.04 and how to configure it and how to create an admin user, for any comment regarding this tutorial please comment below.


