How to Install Windows 10 Technical Preview on Oracle VirtualBox
Would you like to test drive Windows 10? I Would suggest installing it virtually and not on a stand alone PC.
Here is what you’ll need:
1. Download and install Oracle VM VirtualBox.
2. Windows 10 Technical Preview .ISO
Installation:
1. Once you have installed Oracle VM VirtualBox, Run it.
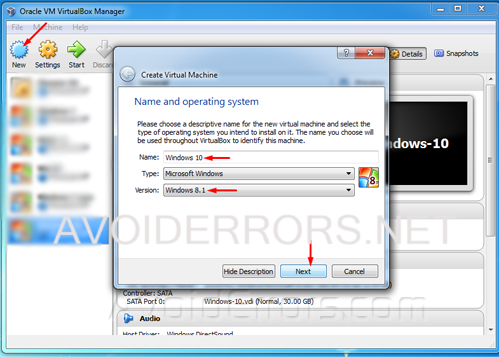
2. Click the “New” button on the top left of the in the main window to create a new virtual machine.
3. Name your operating system something like “Windows ten” and choose Windows 8.1 from the version drop down list. *VirtualBox doesn’t have a Windows ten option yet*.
4. From the wizard, Set the Memory size to 1024 MB or higher.

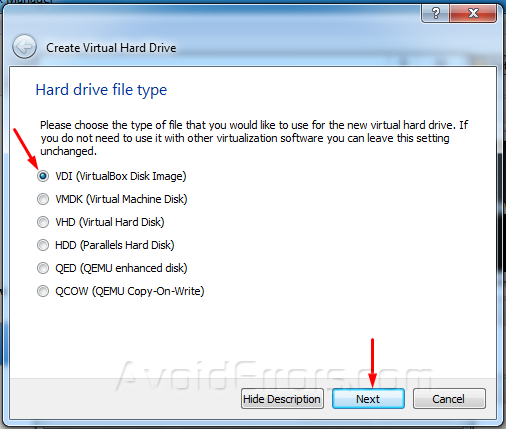
5. Create a virtual hard drive as shown:

6. Select VDI from hard drive type window.
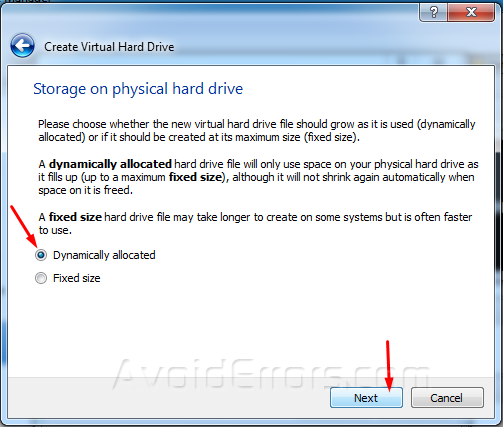
7. Now select Dynamically Allocated and click on next button.
8. This last window will give you the name and hard drive size. Here if you like you can change the default hard drive size and the chosen name and click on create.

9. Select the newly created Windows VM and click on Settings, select Storage in the left pane, select the Empty IDE Controller from the right, then Click on the little disk icon, and Choose a virtual CD/DVD disk file… to browse and select the Windows ten Technical Preview .ISO

10. Once selected click on OK.

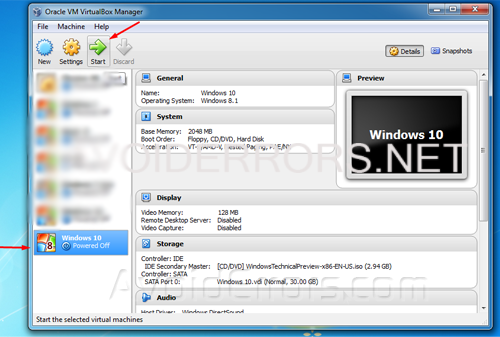
11. Start your Windows ten Technical Preview VM.
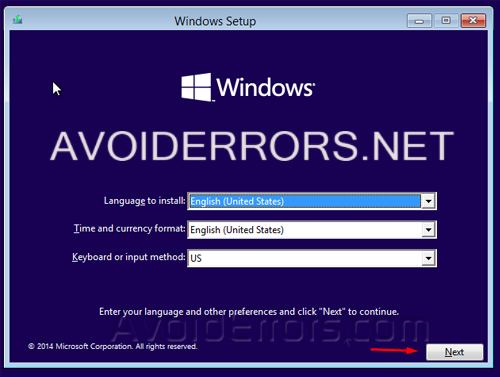
12. Select the Language Time and Keyboard method from the drop-down and click on Next.
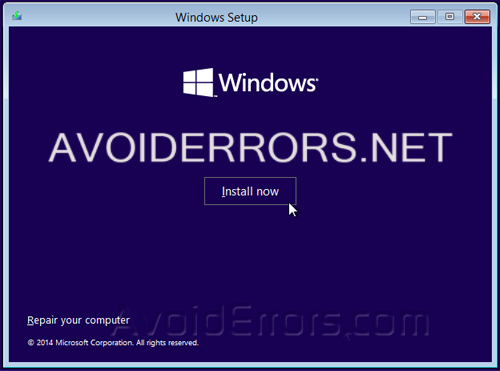
13. Then click on Install now.
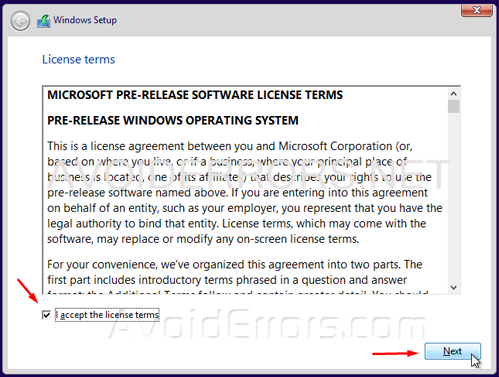
14. Check mark I accept the license terms and click on Next.
15. Select Custom: Install Windows only (advanced) from the installation type window.

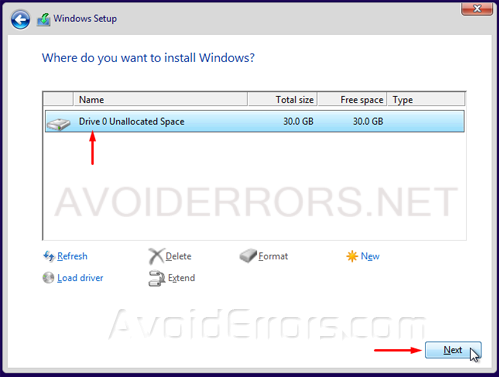
16. Select the only Unallocated drive available and click on next. This is the VDI Disk you created earlier.
17. This process will install all necessary files to the drive. This may take a while depending on your computer speed.

18. While in the installation of Windows the VM will re-start several times, don’t press any keys if it ask you too.

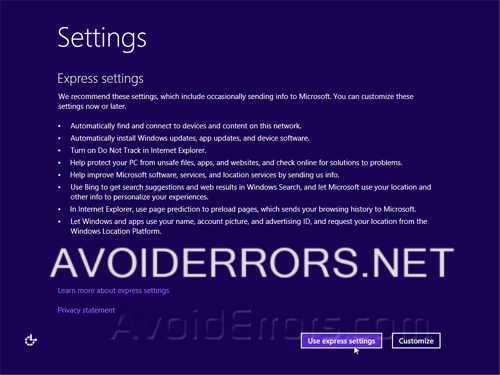
19. Here select Use express settings.
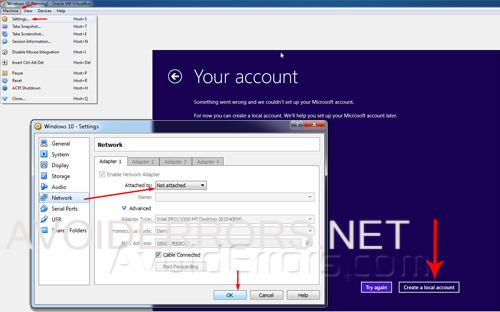
20. Log in using your Microsoft email account or you can do what I did to use a local account = Go to Machine -> Settings -> Network -> and select Not attached from the Attached to: drop-down.
21. Once the local account has been created you are ready to use Windows ten.

22. If you disabled the network to create a local account then don’t forget to re-enable it to have access to the internet, By repeating step: 20 and selecting NAT or Bridge for the drop-down.


