Disable the Snipping Tool in Windows 11
Windows comes with a program called the Snipping Tool that lets you take screenshots. You can use this tool if you want to show someone something or save a copy of what is on your screen.
But you might not need this tool on your device if you don’t use it to take screenshots or if you use other third-party apps instead. As a result, this guide will help you turn off the Snipping Tool on your Windows 11.
Local Group Policy Editor
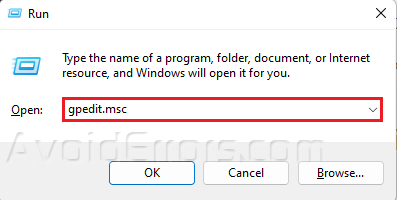
Press Win + R to open Run dialog.
Type gpedit.msc and press Enter.
Navigate to the following folder:
User Configuration > Administrative Templates > Windows Components > Tablet PC > Accessories
Open the Accessories folder and double-click on Do not allow Snipping Tool.
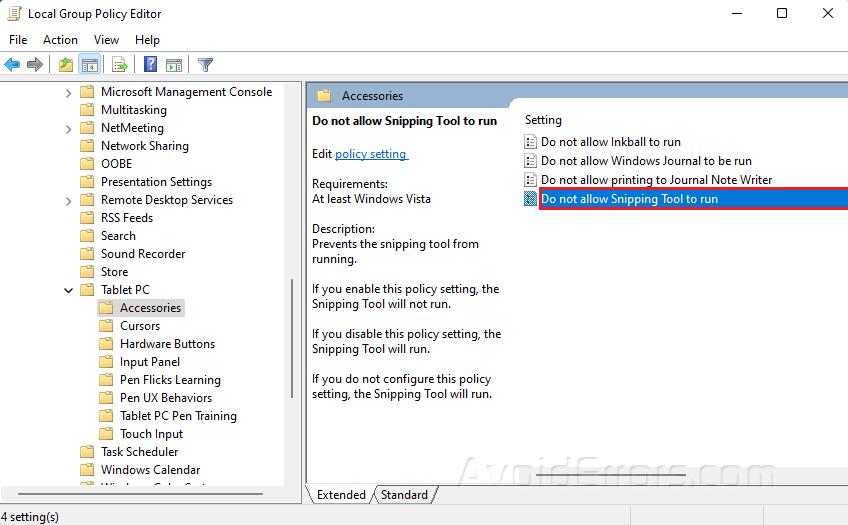
Select Enabled.
Click on Apply and OK.

Restart your PC to apply the changes.
Registry Editor
Press Win + R to open Run dialog.
Type regedit and press Enter.

Navigate to the following location:
HKEY_LOCAL_MACHINE\SOFTWARE\Policies\ Microsoft\TabletPC

Right-click on TabletPC and select New then click on DWORD (32-bit) Value.

Name the folder as DisableSnippingTool and press Enter.
Double-click on the new file and select Hexadecimal as the base.
Set the value to 1.

Click OK to save your changes.
Restart your PC.


