How to Fix Windows 10 won’t Shut Down
Some users report Windows 10 won’t shut down, it is stuck for hours at shut down windows. This is very frustrating. In this guide, we will show you how to fix Windows 10 won’t shut down problem.
NOTE: ensure you are really stuck to use these solutions, because sometimes there may be changes, such as updates are causing the delay. First, be patient and leave it up for two and a half hours. If it exceeds the hours (two and a half), try the following fixes:
Method #1: Force Shut Down
To fix the issue for the long run, you need to force your PC to shut down. To do so:
1. Hold down your power button until the PC is shut.
2. Unplug the power cable.
3. Remove your battery.
4. Hold down the power button for 15 seconds then return the battery.
5. Start your PC then try to shut it down normally.
Method #2: Ensure you have the Latest Windows 10 Version
Microsoft sends new updates which resolve the common problems. Therefore, checking for updates is an efficient way to solve Windows 10 won’t shut down problem. To check for any updates:
1. Click the Windows icon on the taskbar to open the start menu.
2. Choose Settings from your start menu.

3. Select Updates & Security.
4. Under Windows Update, click Check for updates button. Your PC will then check for updates, download and install any updates found.
5. If you have updated your Windows 10, check if you have fixed Windows 10 won’t shut down problem.
Method #3: Disable Fast Startup
Power configuration issues can cause Windows 10 won’t shut down problem. According to Windows 10 users, you can rectify this problem by disabling a few power settings. To disable fast startup:
1. Click the search icon or search bar on the taskbar. Type control panel then enter the first match.

2. In the Control Panel, select Hardware and Sound.

3. From the right pane, choose Power Options.

4. From the left pane, choose Choose what the power buttons do.

5. Choose Change settings that are currently unavailable.

6. Under Shutdown settings, uncheck the checkbox next to Turn on fast startup (recommended). Then click Save changes.

Method #4: Repair Windows System Files
Corrupt or broken files can cause Windows 10 won’t shut down problem. Fortunately, Windows 10 has a built-in tool called System File Checker that restores any problematic files in your PC.
1. Click the search icon or search bar, type command prompt then right-click on the first match and choose Run as administrator.

Click Yes to permit it.

2. Type the following command then hit Enter:
sfc /scannow

3. Your PC will be scanned for corrupted files and try to rectify them. After finishing scanning, you will see the results on the window.

Hopefully, scanning for corrupted files and fixing them rectifies your Windows 10 won’t shut down problem. If not, proceed to the next method.
Method #5: System Restore
Performing system restore brings your PC to an earlier state, thus avoiding the Windows 10 won’t shut down problem. To do so:
1. Search for the control panel in the search box then enter the first match.

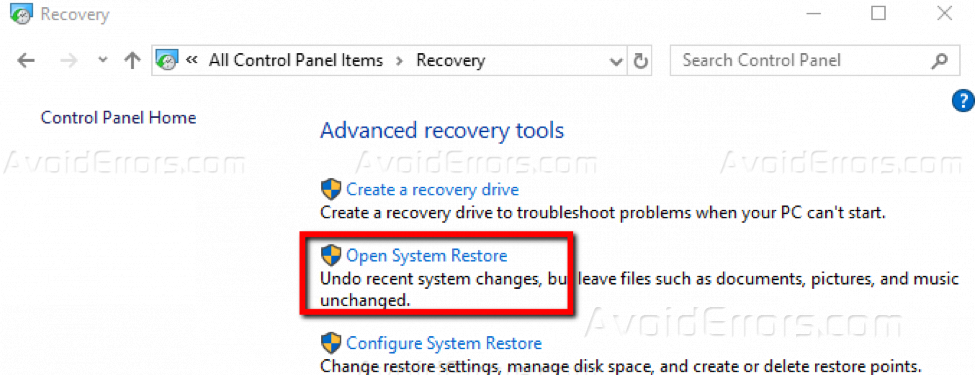
2. In the Control Panel, search for recovery then select the first match.

3. Open System Restore.
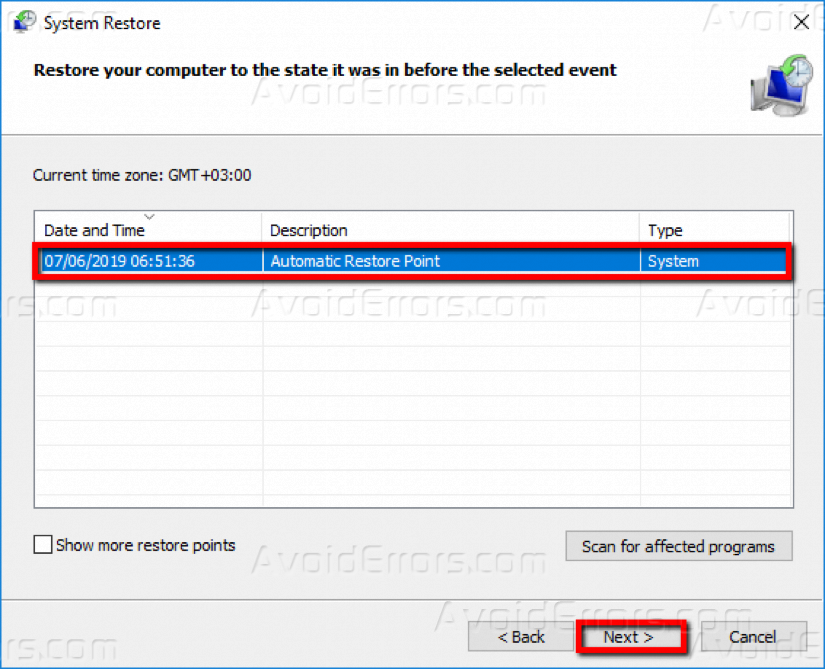
4. In the System Restore window, click Next to proceed.

5. Choose an earlier restore point then click the ‘Next’ button.
6. Click Finish in the next screen. After finishing system restore, try shutting down your PC.
Conclusion
That’s it, at least one of these solutions will fix your Windows 10 won’t shut down problem. Do you know any other fixes that work? Let’s know in the comment section below.


