How to Fix your Mouse from Auto Scrolling in Windows 11
Common computer faults will be fixed by this software, which will also safeguard you against data loss, malware, hardware failure, and optimize your PC for optimum performance.
Windows 11’s mouse auto-scrolling works without the user’s input. However, it can be irritating to watch your computer perform tasks that you have explicitly forbidden. Because of this, Windows 10/11 may scroll down automatically and jump to the most pressing problems.
Update the mouse drivers
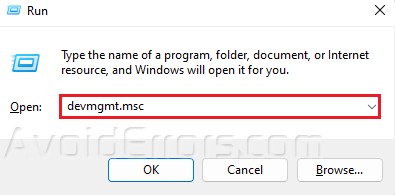
Press Win + R to Launch Run app.
Type in “devmgmt.msc” and press OK.
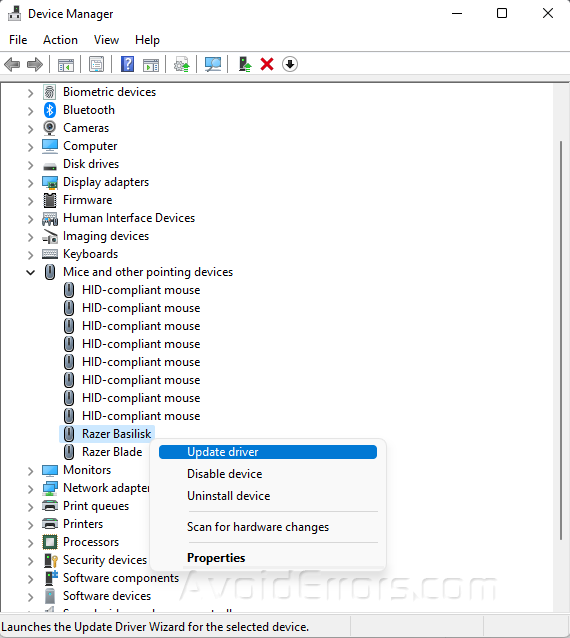
Look for Mice and other pointing devices and press the drop down arrow.
Right-click on your mouse and press Update driver.
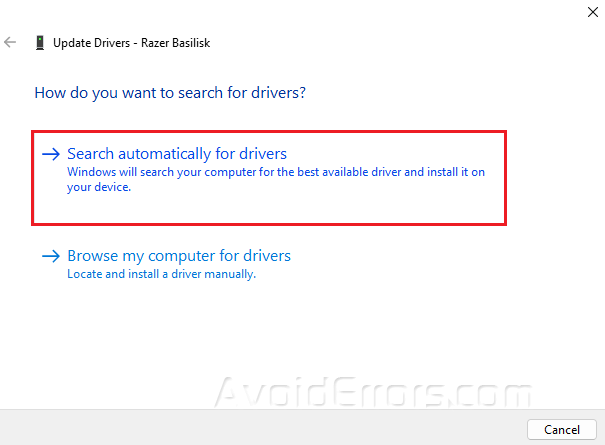
Select Search automatically for updated driver software.
Remove and re-plug the mouse
The mouse will be able to rest and recharge if the USB port is unplugged. After a little while, you can re-plug it into a different USB port. Any mouse connection problems should be resolved with its assistance.
Restart your computer
Press the Windows button and click on the Power icon.
Select Restart.

Update Windows
Press Win + I to open Settings.
Go to Windows update and select Check for updates.
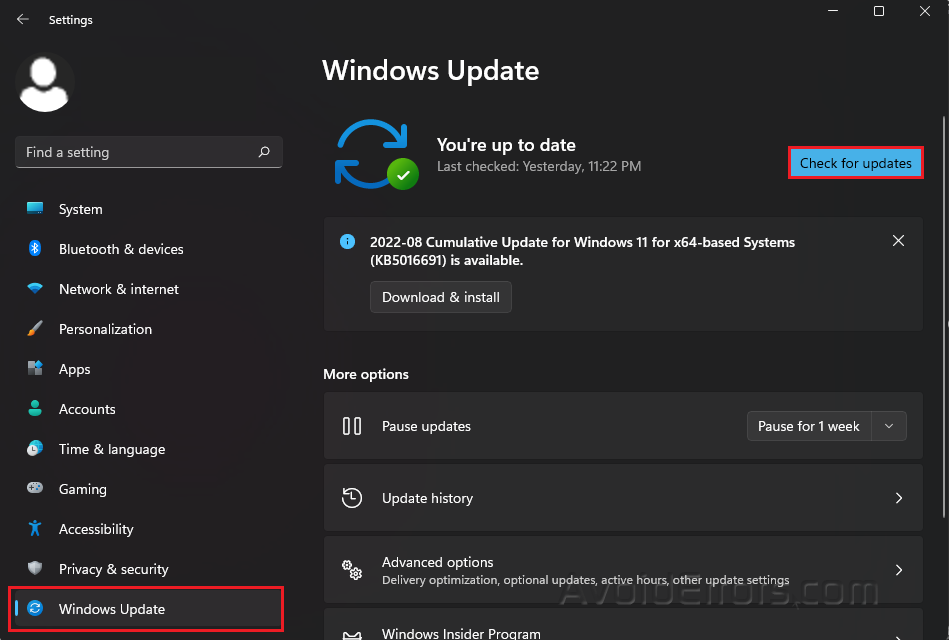
Windows will look for updates and download them automatically if there are any.
Switch to another mouse
By using a different mouse, you can figure out where the problem is coming from. Get a mouse that works well and plug it into your computer (wirelessly or plugged).
If the problem with your laptop scrolling down or up on its own goes away, you should get a new mouse. Also, if the problem keeps happening, it’s coming from your computer.
Uninstall recent updates
Press Win + I to open Settings.
Go to Windows Update and select Update history.

Under Related settings, click on Uninstall updates.

Right-click on the update and select Uninstall.


