How to Install Raspberry Pi Raspbian OS on a PC
Raspbian is a free operating system based on Debian optimized for the Raspberry Pi. An operating system is the set of basic programs and utilities that make your Raspberry Pi run.
Here’s is what you need to Install Raspberry Pi Raspbian OS on a PC:
- Download Raspbian Operating System ISO.
- Download Rufus. A great app for creating a bootable USB.
- You will need a 2GB or larger USB Stick.
Video Tutorial
Install Raspberry Pi Raspbian OS on a PC
Once you have downloaded Raspbian OS, Rufus, and the USB flash drive is plugged to the PC, then it’s time to create the bootable USB. Run the rufus app.
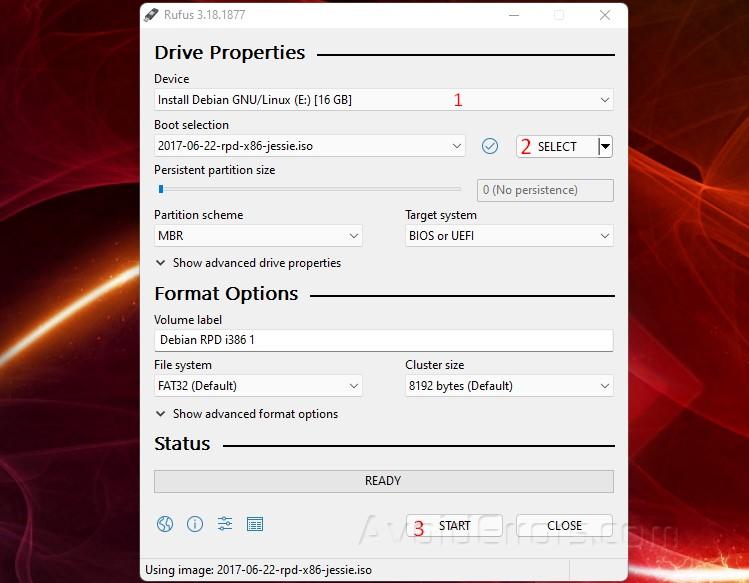
- Select the USB from the dropdown menu. If it’s not already selected.
- Select the Raspbian Operating System ISO.
- Click on start. To create the Raspbian bootable USB drive.
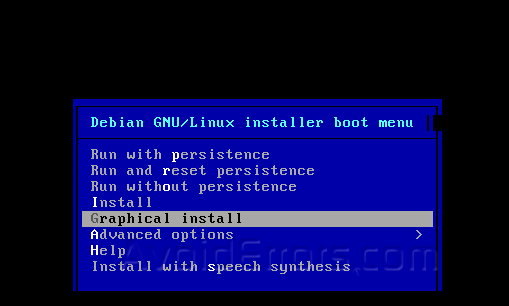
Once bootable USB is created, plug it on to the PC you plan to install Raspbian, and Boot your Computer from a USB drive
To begin the installation of Raspbian, select “Graphical Install”.
Select your preferred language, and “Continue”.

On this step, it’s recommended to leave the default selection “Guided-use entire disk” and click Continue.

It’ll show two drives one might be the USB. Make sure to select the Hard disk not the USB drive. Click Continue again.

Here select “All files in one partition” and hit ‘Continue’.

Select “Finish partition and write changes to disk“. Continue.

On this next screen is asking to confirm the partitioning of the Hard disk, here select “yes”. Continue.

This next prompt will ask you whether you want to install the GRUB boot loader on the hard disk. Select “Yes”, then ‘Continue’.

Confirm which drive you wish to install the GRUB boot loader on. If in the process you did not partition the hard disk it should look like the image below.
Here choose the option that start with ‘/dev/sda’. as shown.

The installation is complete. Remove the USB flash drive from the computer and hit “Continue” to reboot the PC.

Now you have a Raspbian OS installed on your personal computer.


