How to Create and Manage Storage Spaces in Windows 10
Storage Spaces is a feature in Windows 10 that allows you to group multiple hard drives of different sizes into a single virtual drive. It can create mirror copies of your data across multiple drives for backup. To setup Windows 10 storage spaces you need at least 2 hard drives.
The ability to group different drives is not the most important aspect of Storage Spaces. What is important is the ability to configure different types of data protection.
How to Create a Storage Space
1. Make sure all the drives you want to include on the Storage spaces are connected to your computer.
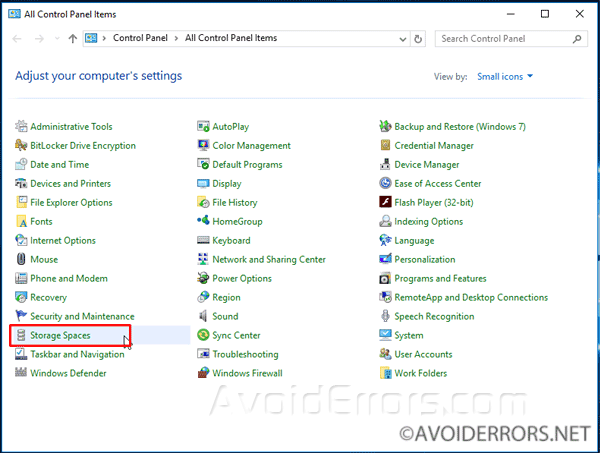
2. Go to Control Panel, Storage Spaces.
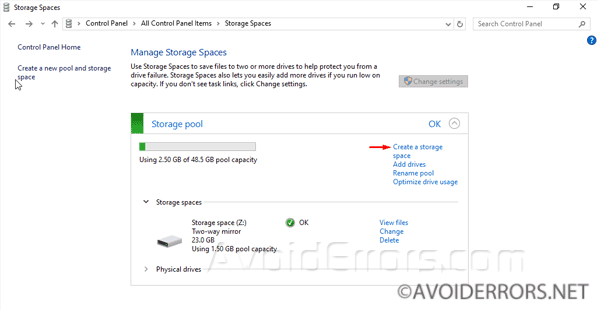
3. Click on “Create a new pool and storage space.”

4. Select the drives you want to add in the storage pool and click on Create Pool button.
Note: All data will be erased during this process make sure to create a backup before continuing.

5. Choose a name other than the default. Then choose the drive letter and NTFS as the file system, you can also choose REFS (Resilient File System), which is a new “local file system. It maximizes data availability, despite errors that would historically cause data loss or downtime. Data integrity ensures that business-critical data is protected from errors and available when needed.”
6. Pick the resiliency type you want to use for this particular storage space.
Simple (no resiliency): A simple storage space writes one copy of your data and does not protect you from driver failures.
Two-way mirror: This option is similar to RAID 1. This option writes 2 copies of your data by writing them to both drives (or set of data drives), helping to protect your data from a single drive failure. Two-way mirror requires a least two drives.
Three-way mirror: This option writes three copies of your data on the drives, to protect your data from two simultaneous drive failures. Three-way mirror requires, at least, five drives.
Parity: This option is similar to RAID 5. A Parity writes your data with parity information, helping you to protect your data from a single driver failure. Parity option requires a least three drivers.
7. In the Size Maximum field, enter the size you want to allocate. Keep in mind that you can pick any size you want, ie. 50TB. It doesn’t matter if you don’t have the physical storage space available because you’ll get an alert when it’s time to add more storage.
8. Click Create storage space button to create your first storage space.

Create multiple storage spaces
1. If you want to create more storage spaces, Go to Control Panel, Storage Spaces.
2. Under Storage pool, click the Create a storage.
3. Select your preferences don’t forget to choose a name other than the default.
4. Click the Create storage space button to complete the process.
Add new drives to a storage pool
There is no specific time to add drives to the pool, you can always add more drives to the pool to expand a storage space:
1. Make sure to connect all the drives you want to include in the pool.
2. In “Manage Storage Spaces” under storage pool click the Add drives link.

3. The drives available to add to the pool will appear, if you have multiple drives select the one you want. Check mark “Optimize drive usage to spread existing data across all drives”, and click the Add drives button.

Properly remove a drive in use
1. Go to Control Panel, Storage Spaces.
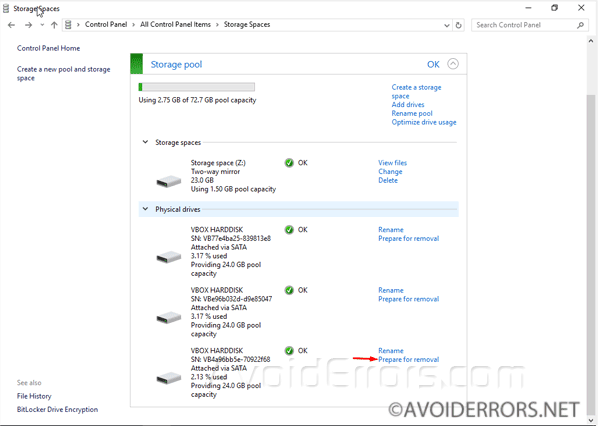
2. Under storage pool expand Physical drives.
3. Locate the drive and click the Prepare for removal option.
4. Make sure that is the correct drive and then click on Prepare for removal button.

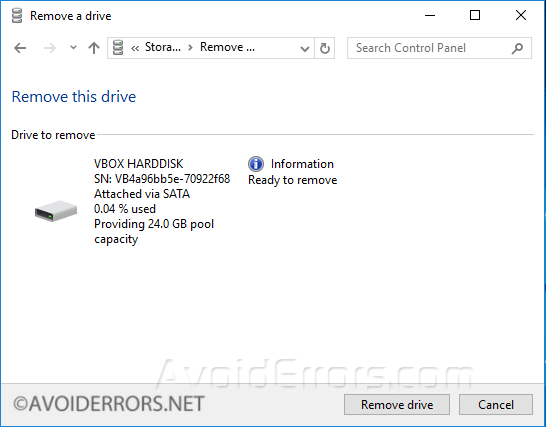
5. Again locate the drive you want to remove and click the Remove link.
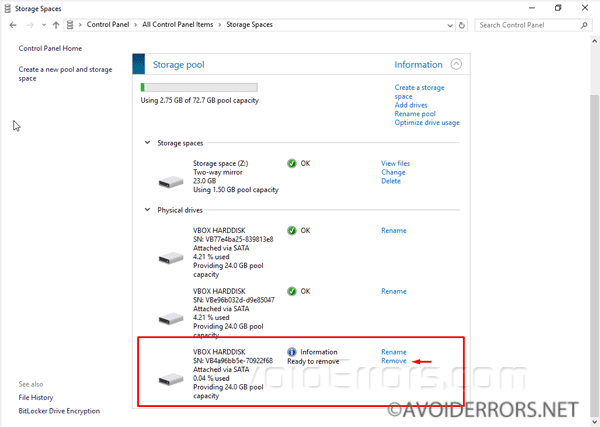
6. Finally, click the Remove drive button to complete the removal.
Delete a Storage Space
1. Go to Control Panel, Storage Spaces.
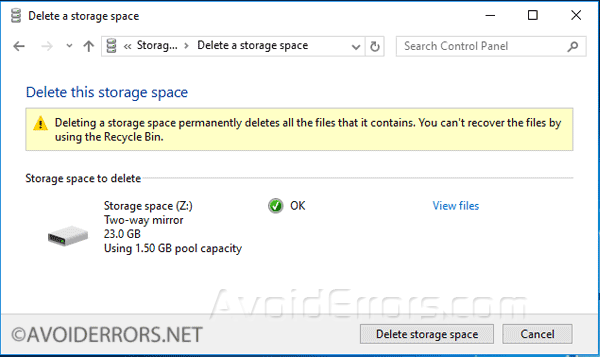
2. Under “Storage Spaces” locate the “space” you no longer need, and click the Delete option next to it.

3. When ready confirm by clicking the Delete storage space button. Note: Deleting a storage space permanently deletes all data.
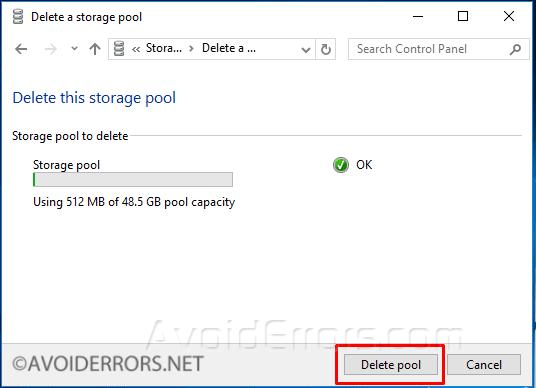
Delete a Storage Pool
To delete a Storage pool you must first delete all storage spaces in that pool. If not the delete option wont be available.
1. Go to Control Panel, Storage Spaces.
2. Click the Delete pool option under the storage pool you want to remove.

3. Then click the Delete pool button to complete the deletion process.