How to Install a new CD/DVD Burner
This is a general guide to guide users thought the proper steps to install a PATA based optical drive (a new CD/DVD Burner) into a desktop computer system.
1. Shut down the computer and unplug the power cable.
2. Remove the computer’s side panel. by removing the screws from the back of the case.
3. Set the jumper. The Jumper is a small plastic and metal plug on the back of the drive located on position No.#3 on the attached disc Burner image witch it must be set to either “master” or “slave” mode.

Note: Choose the master setting if you’re installing a new disc Burner and is going to be used as you main CD/DVD Burner. Choose the slave setting if you’re going to use the new CD/DVD Burner as a secondary to an existing hard drive.
4. Locate a free disc Burner bay, then slide the new optical drive into place.
5. Mount the CD/DVD Burner in place with the mounting screws that came with the CD/DVD Burner.
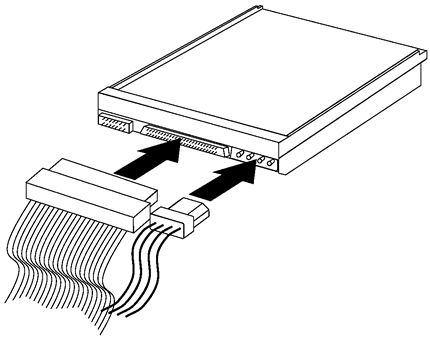
6. Connect a standard four-prong disc burner power cable from the computer’s power supply to the new CD/DVD Burner.
7. Connect the computer’s IDE cable to the CD/DVD Burner. make sure to align the notch.
8. Close the computer’s case, reconnect the power cable, and start the computer. Your computer should recognize the new installed CD/DVD Burner on start-up.


